/
Adding Product Information for The Iconic
Adding Product Information for The Iconic
- Sandra Petrovic
Owned by Sandra Petrovic
Step-by-Step Guide
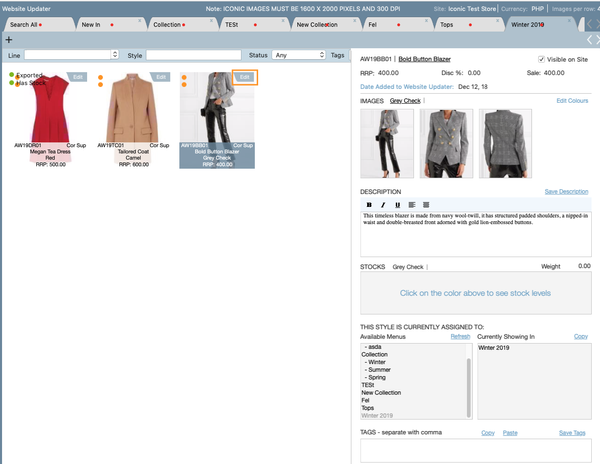
1. The first step is to fill out the product information:
- Select 'Edit' on the top right of each style
- The RRP will auto-populate from data entered in the bulk pricing screen. You can also apply a discount if needed.
- To add images, drag and drag from from your folder, or use the Capture function.
- Enter in the style Description
- Enter in the Fabrication details of the garment
- Enter in Care Instructions
- Stocks: When you select the product colour, the stock will appear. (This will only appear if you have linked your Customer: Online Website' to a warehouse - this is completed when you set up your Online Store as a customer)
- Available Menus: This will show you where you style will be located on your website. Add in additional categories when needed.
- You will not need to fill in 'Tags'
2. Next click on 'Iconic Fields'. This will take you to another screen where you will fill in information required by The Iconic.

3. Next select the 'Iconic Field' button at the bottom of the screen. This will take you to a screen where you will need to fill in the information required by The Iconic.
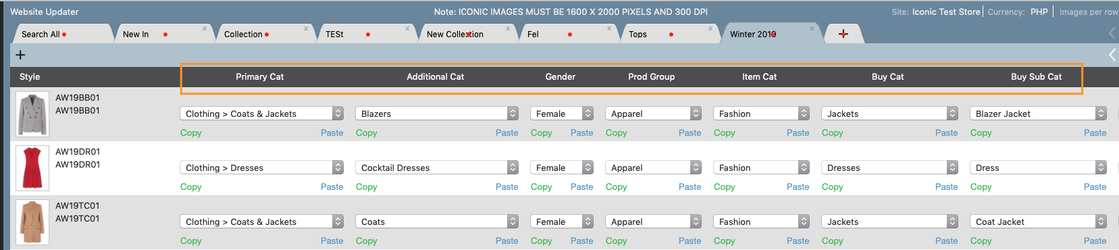
We have a few functions in this screen designed to save you time.
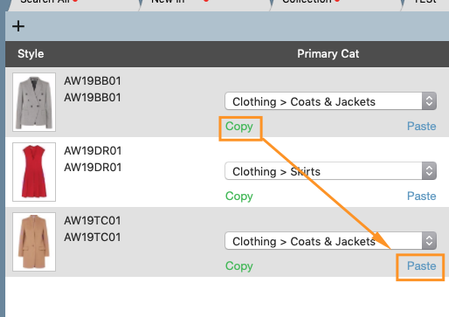
- Copy and Paste - In the below example I have two styles in the Coats & Jackets Category. Instead of selecting this category for each product I can click copy under the first style and then click on paste under my other items that need to be in that same category (Coats & Jackets)
- Copy 2 All - At the bottom of each column there is a 'Copy 2 All' function which copies the first selected category, down the rest of the list. In this example, I have click on 'Copy to All' in the Gender Column.
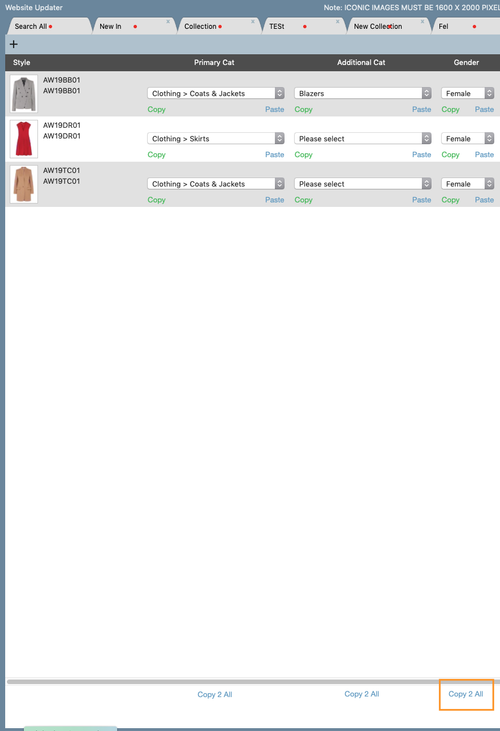
Once you have finished inputting all the information, click on 'Save Fields' at the bottom right of the screen

, multiple selections available,
Related content
Adding Product Information for The Iconic
Adding Product Information for The Iconic
More like this
How to add/update style information
How to add/update style information
More like this
How to Add a Style
How to Add a Style
More like this
Entering in Style Information
Entering in Style Information
More like this
Exporting Products to The Iconic
Exporting Products to The Iconic
More like this
Exporting Products to The Iconic
Exporting Products to The Iconic
More like this