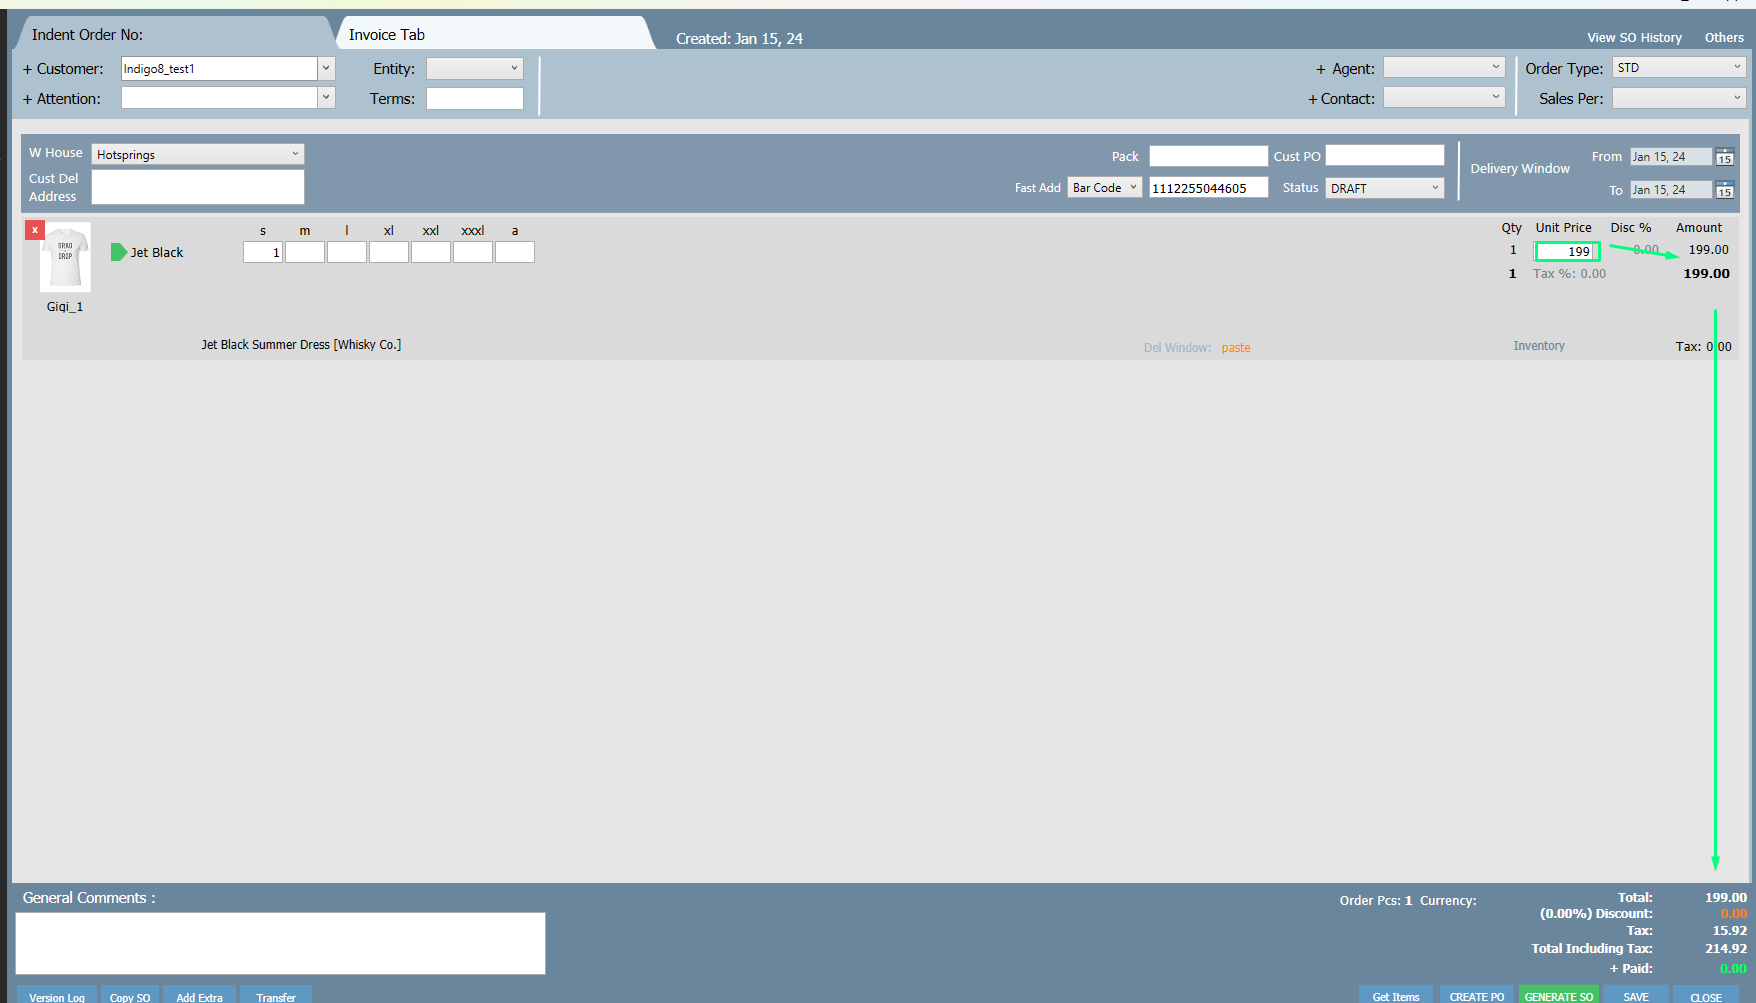
Creating a Sales Order
Every order received will be recorded as a sales order; you cannot generate an invoice without one.
Step-by-step guide
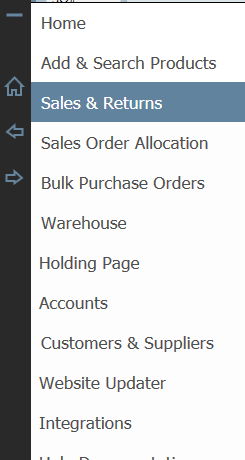
1. Click one of the arrows on the center bar and choose Sales & Returns
2. Press the Indent Order or Stock Order button located at the top right of the screen.
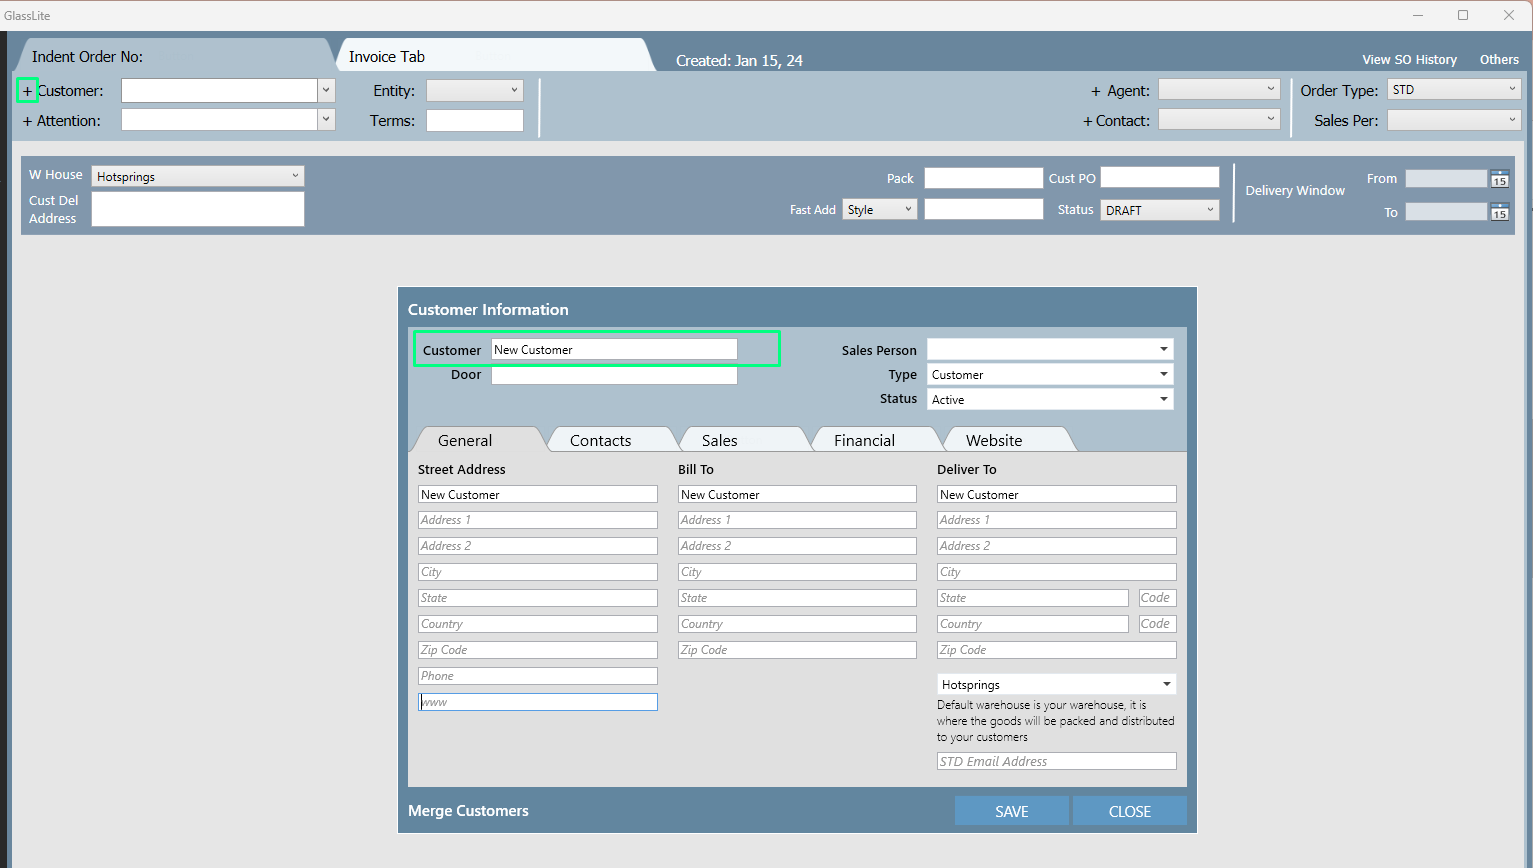
3. The first item to be filled in will be the customer. Usually the first time you use the system and you won't have any customers loaded. No problem, you can add them on the fly by pressing the + button located to the left of the customer field (see image below). Obviously it is important to fill in as much information has possible. Saving the new customer will automatically load it onto the Sales Order.
4. If the customers are already in the system then you can simply type the first few characters of the company name and press the enter key on your keyboard. All matches will be returned in a drop down for you to choose.
Important
When a customer is selected the following items will be loaded automatically in the header (Entity, Terms, Warehouse, Agent). But only if they have already been filled in on the customer screen. if they have not, then upon order generation those fields will be automatically updated on the customer screen, so they will be there for next time.
SUPER IMPORTANT
5. ORDER TYPE - the system has the following order types,
a. STD - A standard WHOLESALE order, meaning that it will pull the wholesale price and add the Qty's to the "to be ordered list"
b. WEB - If you have an integrated web site, all web orders will be put under this order type.
c. POS - If you have an integrated POS (Point of Sale) solution then those sales will but put under that category.
d. OTS - This order is similar to STD, but will automatically be stock order
e. RETURN - When goods are returned.
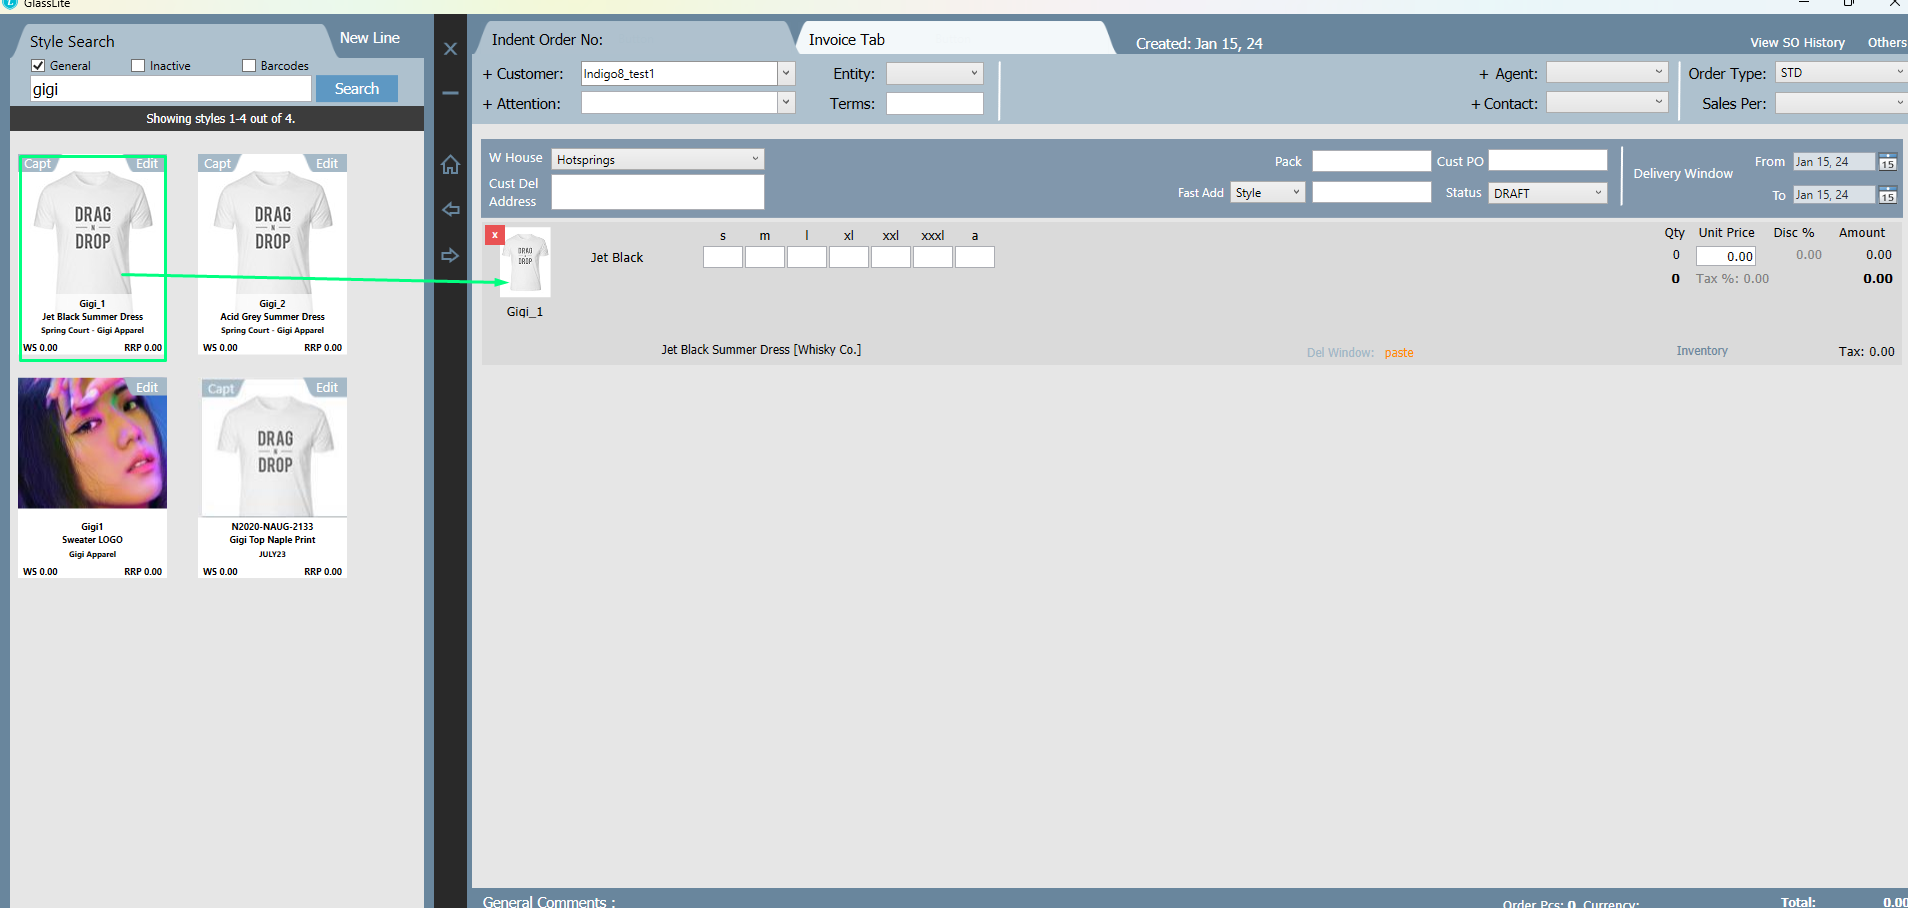
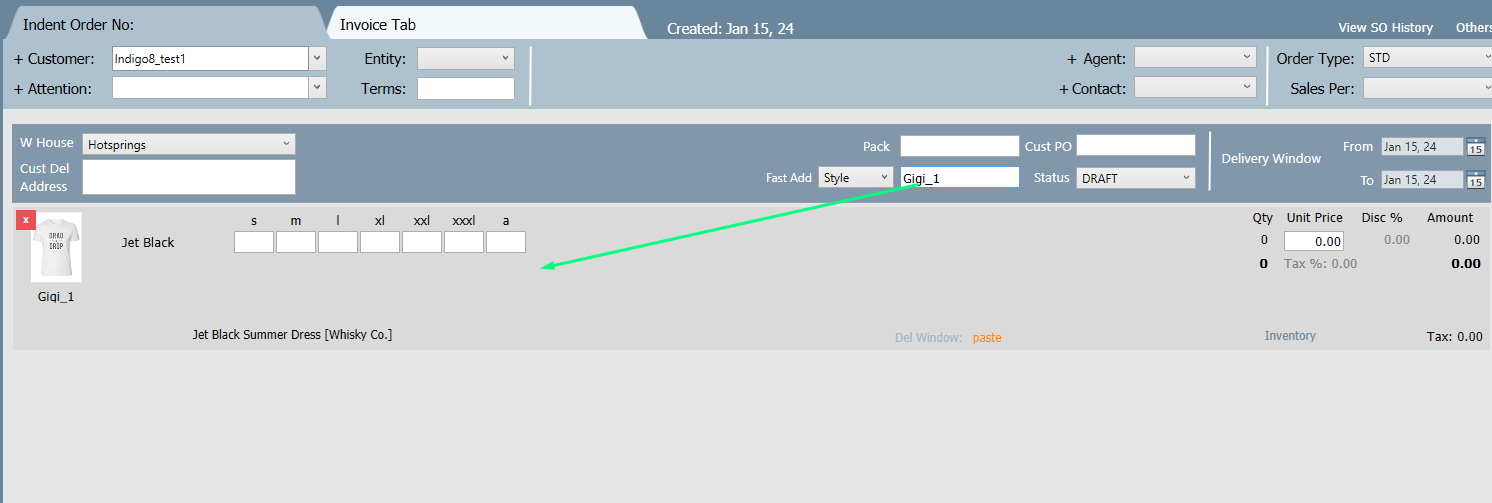
6. Putting styles / products onto the sales order. You can either of the following methods to get styles onto the sales orders
a. Drag and Drop (most popular)
b. Entering the style number
c. Entering the bar code
Note that you can also import orders, go to the import orders section to find out more.
A. Dragging is simple, just search the style you want using the product search on the opposite side of the screen you are on. and drag that style onto the order.
B. Manually entering the style number in the box below and pressing ENTER on your keyboard. Note that you have to enter the style number exactly, this is not a search field.
C. Bar Code is the same as point B above, but you need to change the drop down on the right of the input box to "Bar Code" not "style"
7. Enter the Qty's for the appropriate size and colour. As you enter the Qty, the amount on the right of the page will adjust automatically. if the items do not have a unit price, please enter these in manually OR please go to the pricing section to learn how to add prices.
8. As you enter style the footer totals will automatically update with some information. if you want to apply a discount % to the entire order then click on the discount in brackets and enter it. If this customer always gets a discount then click on the label "Customer" at the top of the screen and go to the finance tab and enter it there. Doing this will apply the discount automatically to every order.
9. Generate the order - The order will not be live in the system until it is generated. To do that press the GENERATE SO button. This will create a PDF of the order which you can send out as a confirmation. Use the buttons at the bottom right of the PDF viewer to print, email etc.
10. Well done, press the Close button and move onto your next order.
Related articles
