Verifying Purchase Order Quantities
- Leon Lu
- Sandra Petrovic
When you receive a delivery from a supplier, it would be standard practice to count how many items you received. In some cases, you will find you received exactly the same number of items that you entered on the purchase order. However, more often than not, you will have received either more or less than what entered on the purchase order. And if you received less than you ordered on the purchase order, you will need to consider whether you want give a customer less than what they ordered or whether you want to create a back order for the items so you can send them to the customer in the future. Your situation will determine which steps you need to follow.
Please select the scenario that applies to you from the list below to be taken to the relevant part of the article:
Step-by-step guide
You received EXACTLY the quantity ordered
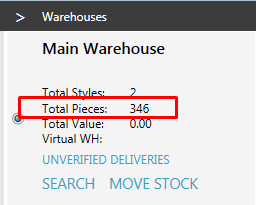
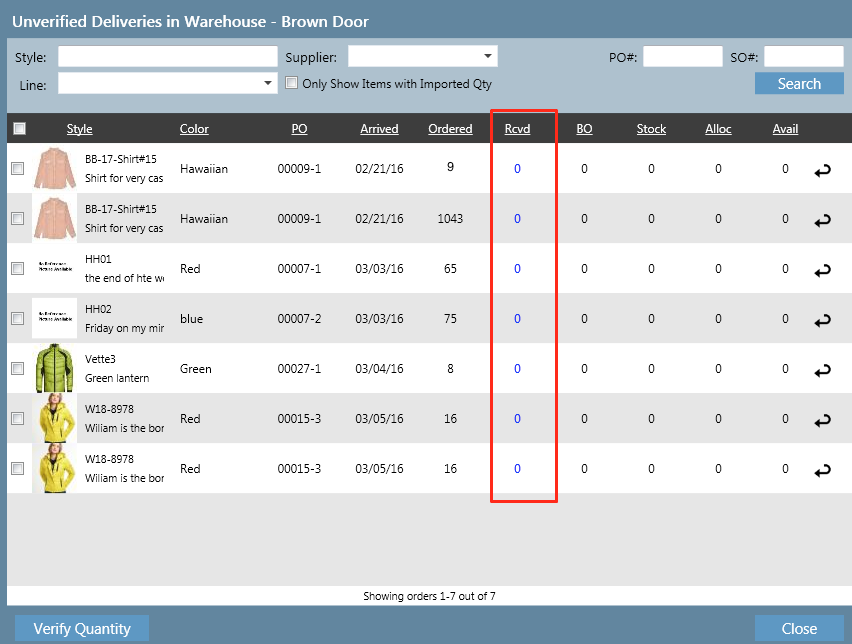
1. Click on arrow and select Warehouse
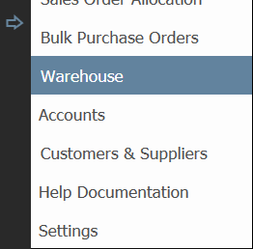
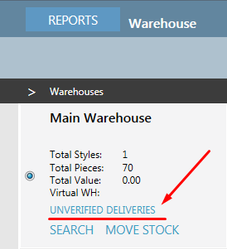
2. Click on Unverified Delivieries button in the warehouse where the stock you wish to allocate has been arrived in.
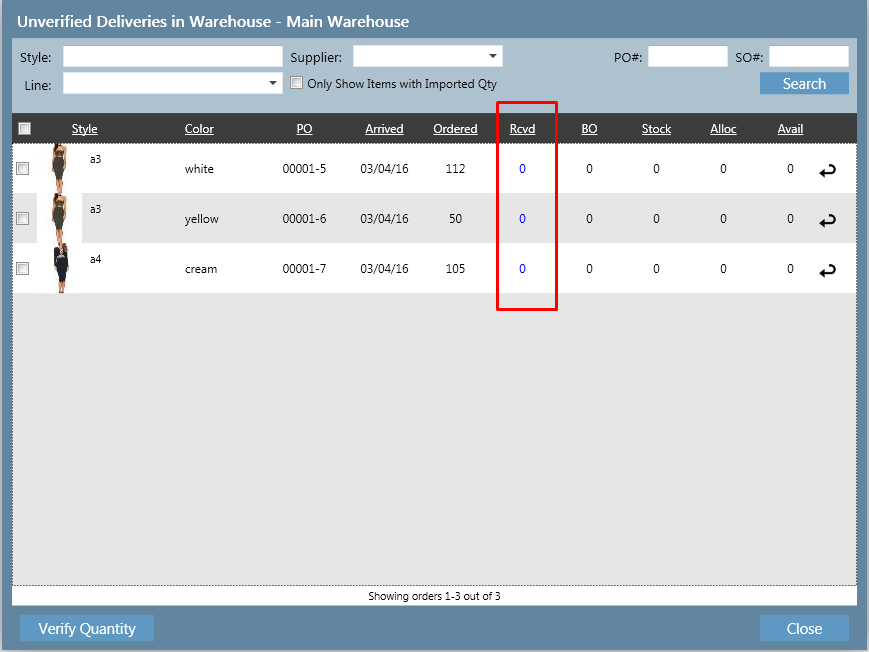
3. A pop up window will open. It will automatically show all the styles that have been arrived in, but have not had their quantities assigned. Tick the boxes of the styles where the quantity received was equal to the quantity ordered.
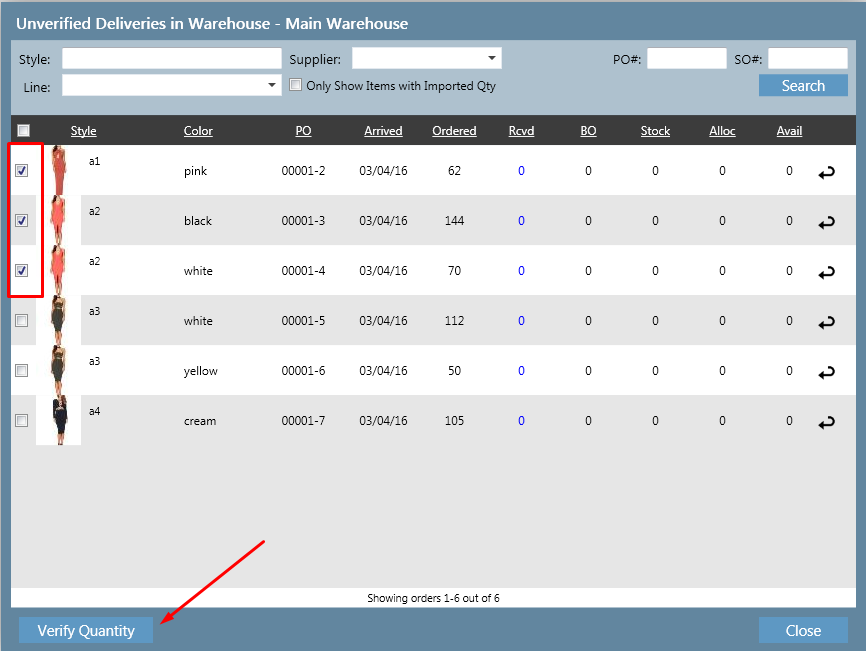
4. Click Verify Quantity button
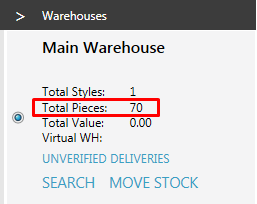
You will notice that the style will disappear from the screen. You will also notice that in the background that the quantity of styles in the warehouse will have increased.
Before After
You received LESS than what you ordered
1. Click on arrow and select Warehouse
2. Click on Unverified Delivieries button in the warehouse where the stock you wish to allocate has been arrived in.
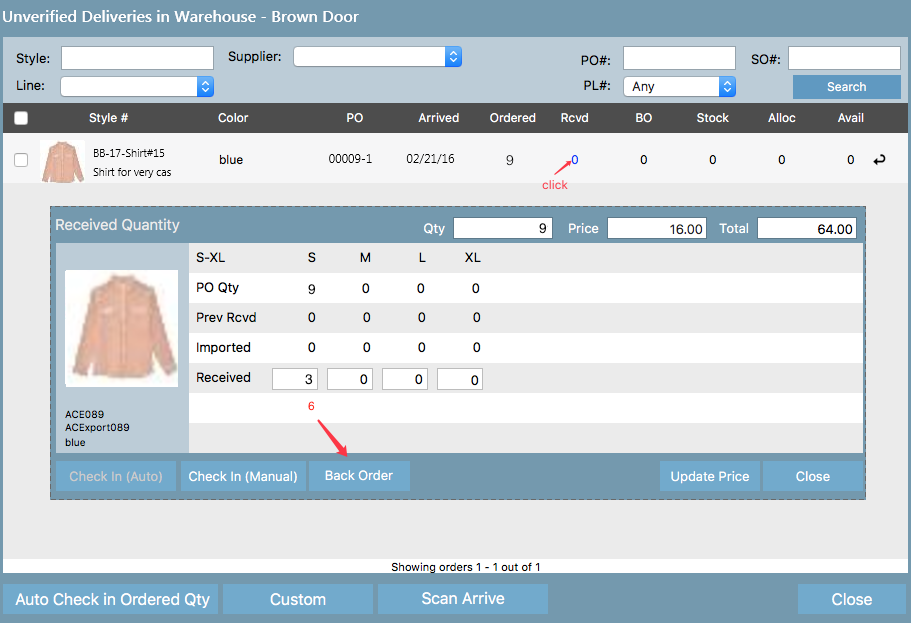
3. To enter the received quantity of a style, click on the blue 0 under the Rcvd column, in the row of the style
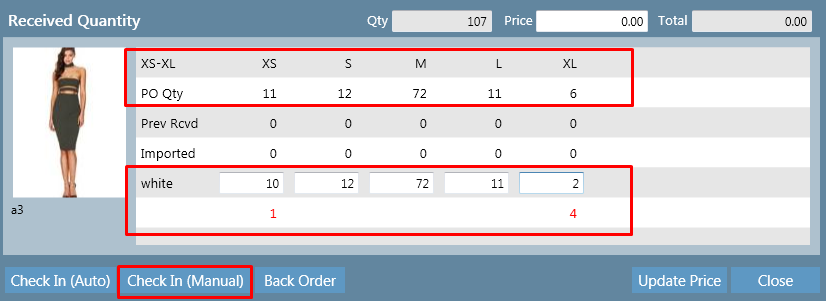
4. A pop up window will open. There will be the PO Qty directly under the sizes, and the white boxes at the bottom of the columns are where you manually type in what you received.
In the example below, I received 10 XS dresses, instead of the 11 that I ordered; so I typed 10 in the box. I also received only 2 XL dresses, instead of the 6 i ordered, so i typed in 2 in the XL column box. The amount you are short will appear in red under the white box. As you can see i am short 1 dress in XS and 4 dresses in XL; hence, the red 1 and 4.
5. There are three buttons on the bottom left side of the screen:
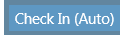
a) Check In (Auto) - The system will decide which customer(s) do not receive their entire order.
b) Check In (Manual) - You decide which customer(s) do not receive their entire order
c) Back Order -You create a back order for the items that have not been received, so that the customer(s) will receive them at a later date
Choose which process you would like to follow from the above options, and read the corresponding instructions:
a) Check In (Auto)
1. Click the Check In Auto Button to have the system automatically determine which customer(s) misses out
b) Check In (Manual)
1. Click Check in (Manual) button. A pop up window will open

2. Click Edit
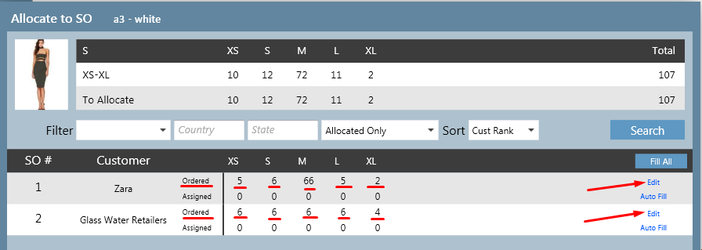
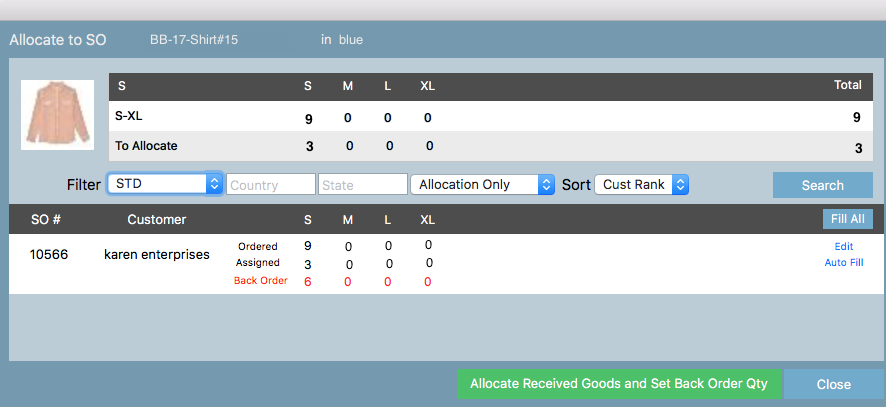
3. Once you click Edit, white boxes will appear where you are to enter the assigned quantity. The To Allocate table up the top of the window will tell you how much you have left to allocate.
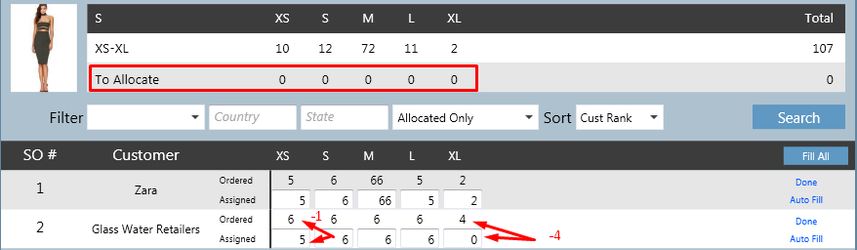
In the example below, I decided Zara was a more important customer than Glass Water Retailers; so I made sure that Zara received all the available dresses, and Glass Water Retailers missed out. Note that the To Allocate quantity is 0 because all the dresses have been allocated.
4. Click Done 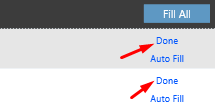
5. Click Confirm Allocation of Stock to Orders
6. The following pop up will appear. Click Ok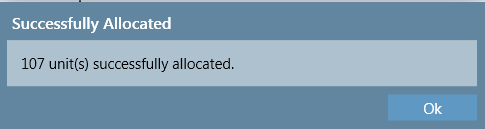
c) Back Order
1. Click on arrow and select Warehouse
2. Click on Unverified Deliveries button in the warehouse where the stock you wish to allocate has been arrived in.
3.To enter the received quantity of a style, click on the blue 0 under the Rcvd column, in the row of the style
4. On the RECEIVED QTY screen you will see a back order button at the bottom, this will only be clickable if there is a back order qty as there is for sizes S, we ordered 9 but only received 3, the supplier will send the remaining next week. So we will put those 6 on back order. In this case instead of using the check in manual button we will use the Back order button.
5. The following pop up will appear, click Create PO Back Order button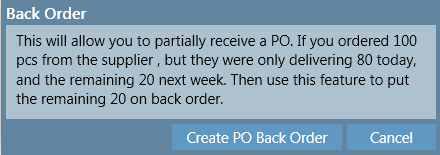


You received MORE than what you ordered
1. Click on arrow and select Warehouse
2. Click on Unverified Delivieries button in the warehouse where the stock you wish to allocate has been arrived in.
3. To enter the received quantity of a style, click on the blue 0 under the Rcvd column, in the row of the style
4. A pop up window will open. Enter the received quantities in the white text boxes.
In the example below, I received 7 dressed in the XS but only only ordered 2 on the PO, so there's a surplus of 5 dresses. That's why there's a green 5 under the XS column. 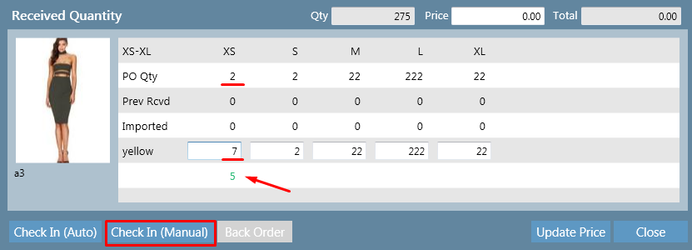
5.Click Check In (Manual) button to assign the extra stock to a customer(s) order. Alternatively, click Check In (Auto) to assign the items to Available Stock and left in the warehouse not assigned to an order.
Because Check In (Auto) is a one step process, the below example is going to follow the steps if you were to select Check In (Manual)
6. Click Auto Fill button. This means that the sales order quantity will be allocated. Note that in the To Allocate row, that there is 5 XS dresses still to be allocated.
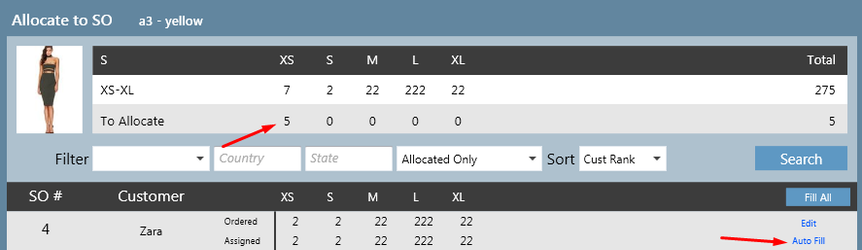
7. Click Confirm Allocation of Stock to Orders
The following pop up will appear
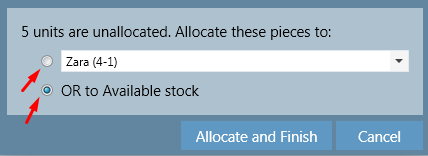
8. The top option will mean you assign the surplus items to the order, so the customer will receive more than they ordered. The bottom option, means you can put it back into available stock within the warehouse. Select one option.
9. Click Allocate and Finish button