Importing Customers
Indigo8 Lite allows you to import customers and their details into the Customers section of the system. The first step is creating an excel file with the correct specifications containing your customer's details. Second step is importing the file into the system.
1. Preparing Your Contact File for Importing
There are two rules for setting up your contacts file:
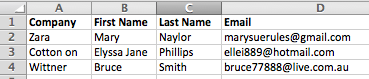
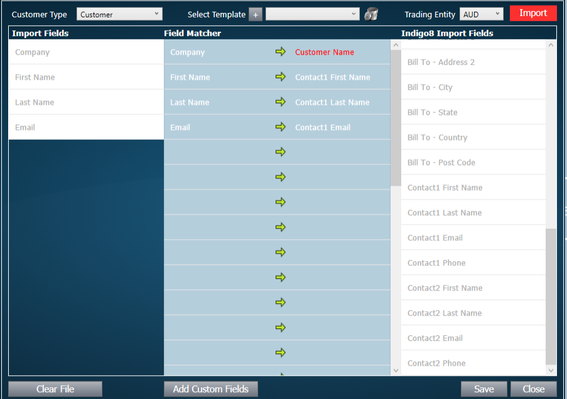
Rule #1: The file must have a header line. The means the first row in the file must describe what's in each column. In the image below, this is Company, First Name, Last Name and Email. You can have as many columns as you need.
Rule # 2: The file must have the .csv extension. When saving your file, select .csv Format from the drop down list before clicking Save.
2. Importing File
1. Click on the left arrow of the black navigation bar, and select contacts

2. Ensure you're within the Clients tab
4. A new window will open. Drag your contacts file into the panel on the left hand side of the screen, and automatically the names of each column will upload in that space.
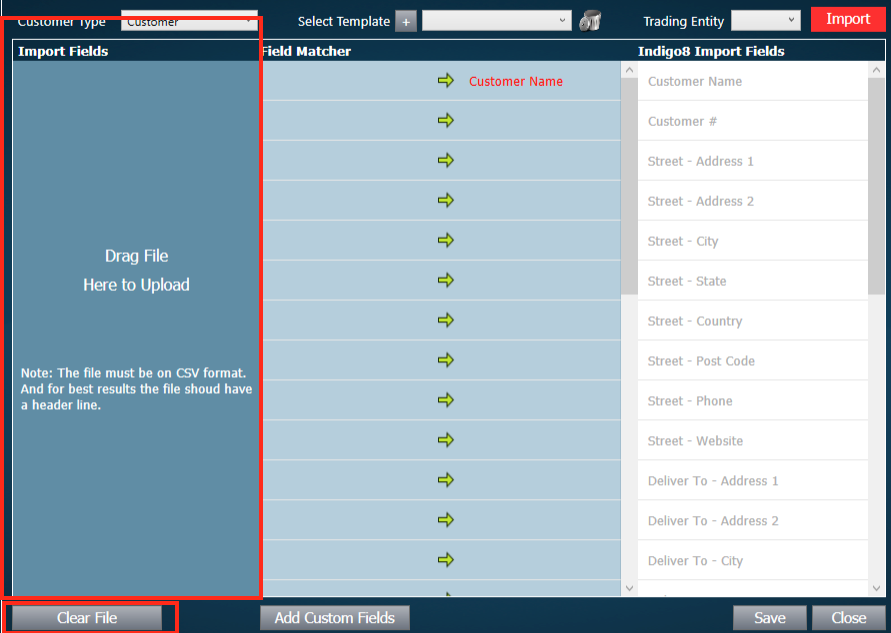
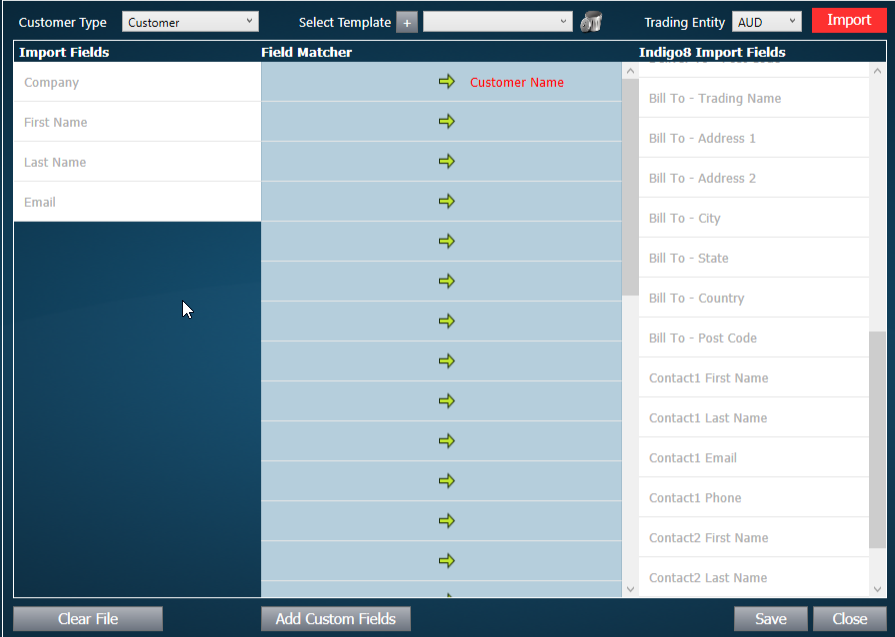
Before dragging the File After dragging the file
If you have chosen the incorrect file, simply click Clear File button and drag the file on again.
5. Next you need to drag the fields from the left panel into the middle panel. These should be on the left hand side of the arrow. Then drag the matching field from the right panel into the middle, to the right hand side of the arrow. For example, Company in my contacts file, would rightly be assigned to Customer Name in a Contact
Important
If you make a mistake when dragging fields to the middle panel, click on the item, and drag it back to it's original position and it should be removed from the middle panel
Important
In the middle panel, there must be one item on the left hand side of the arrow and a matching item on the right otherwise the import function will not work.
6. Work from left to right to ensure that your settings are correct. Choose the Customer Type you are importing, you can skip the Select Template field (refer to Templates section below for more information), and select Trading Entity.

Important
You MUST select a Trading Entity from the drop down list, otherwise the import will not work.
7. Click Import
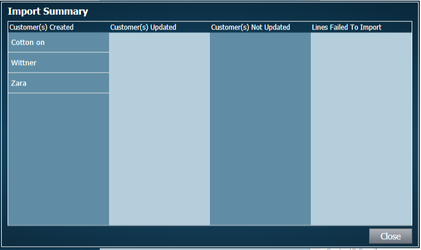
8. If the import has been successful, the following window will open showing a summary of the customers that have been created
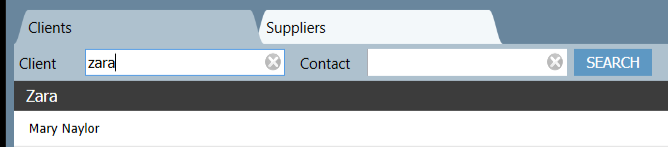
If you search for the new customer, you will see they have been created.
Defining what a template name is
If you will be regularly importing a file with the same headings, it could make the process quicker in the future if you were to create a template. For example, if I always imported a file that had company, first name, last name and email address, then i would save this as a template.
1 Click the + button
2. Type in what you wish to call your template

3. Click Save at the bottom of the window
4. You will notice that the template has been saved in the template drop down list.
Important
Related articles