Integrating BigCommerce with Indigo8 Solutions
This section will outline how to intergrate your existing or brand new BigCommerce website with Indigo8 Solutions.
Step-by-step guide
- Login to your existing or brand new BigCommerce account and go to this link https://store-3e4zb.mybigcommerce.com/manage/microapps/ng-marketplace/apps/7072
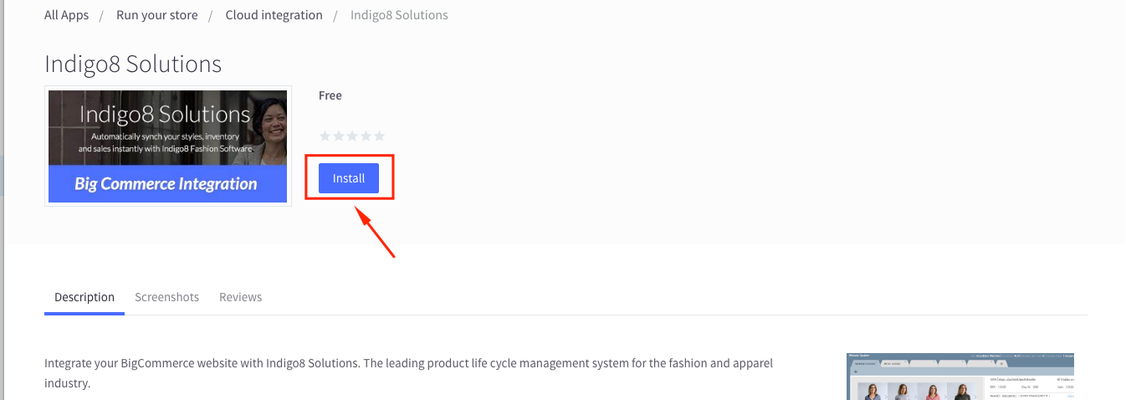
- Click the INSTALL button to install the app
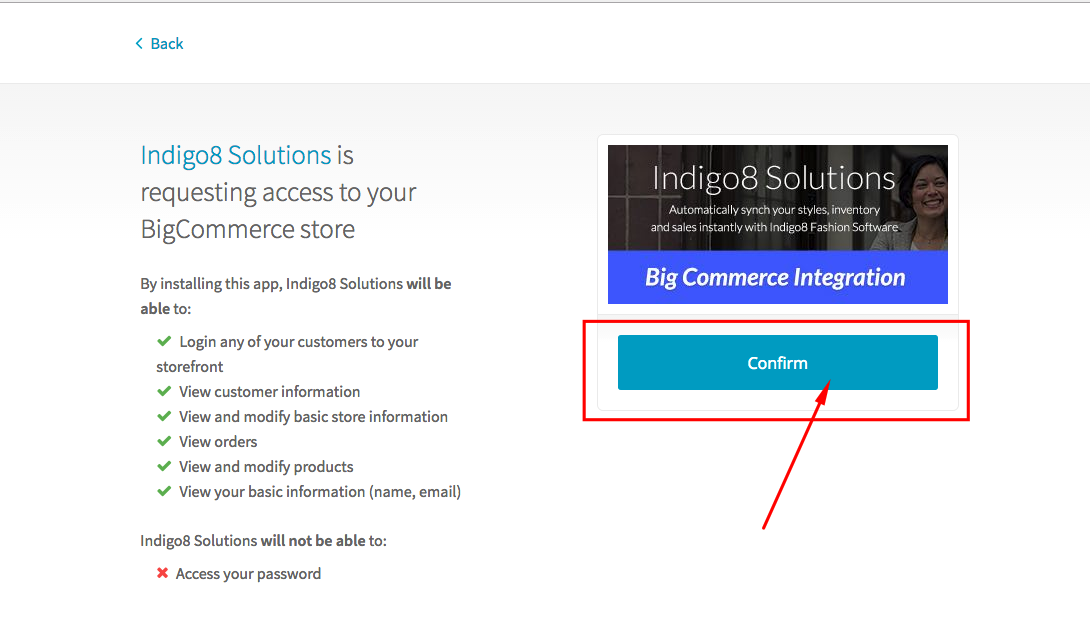
- You will automatically be taken to confirm the BigCommerce installation. Click CONFIRM.
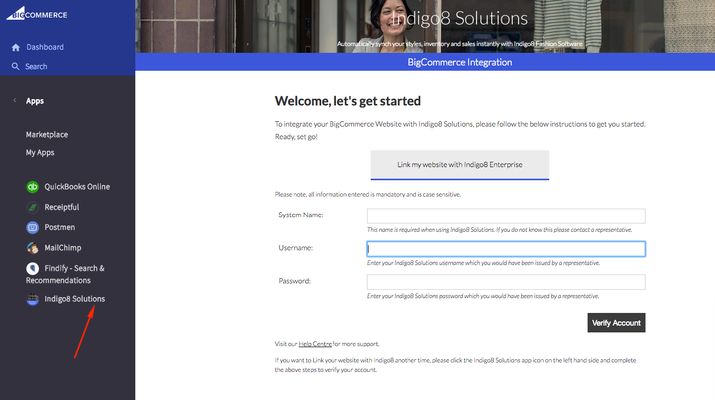
Please wait on this page while it is being redirected. - The installation process should be complete. You will be taken to this page. You will notice the Indigo8 Solutions app on the left hand side.
We will need to log into Indigo8 Solutions and fill in a few details and come back to this page at a later stage. Good tip here is to leave your browser window open and minimise it for the next step. - Login to the system and locate your existing website customer or create a new website customer. This website customer is typically named as your online shop. For example, a business named "Grass Bred" will be called "Grass Bred Website".
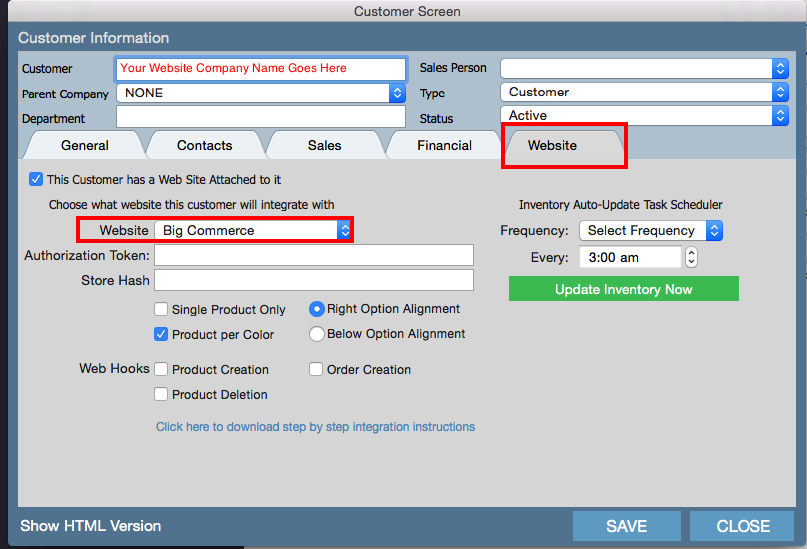
On the customer record, you need to make sure the following is completed in order to link your existing or brand new BigCommerce website with Indigo8.
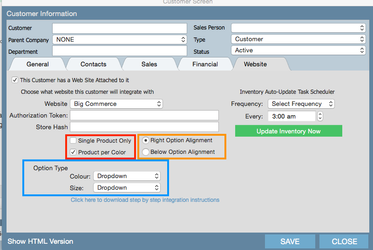
Open up the Customer record and click the WEBSITE tab.- Make sure you have checked THIS CUSTOMER HAS A WEB SITE ATTACHED TO IT. This will assign the given customer record to a specific website.
- Select BigCommerce under the WEBSITE field
- Once done click SAVE.
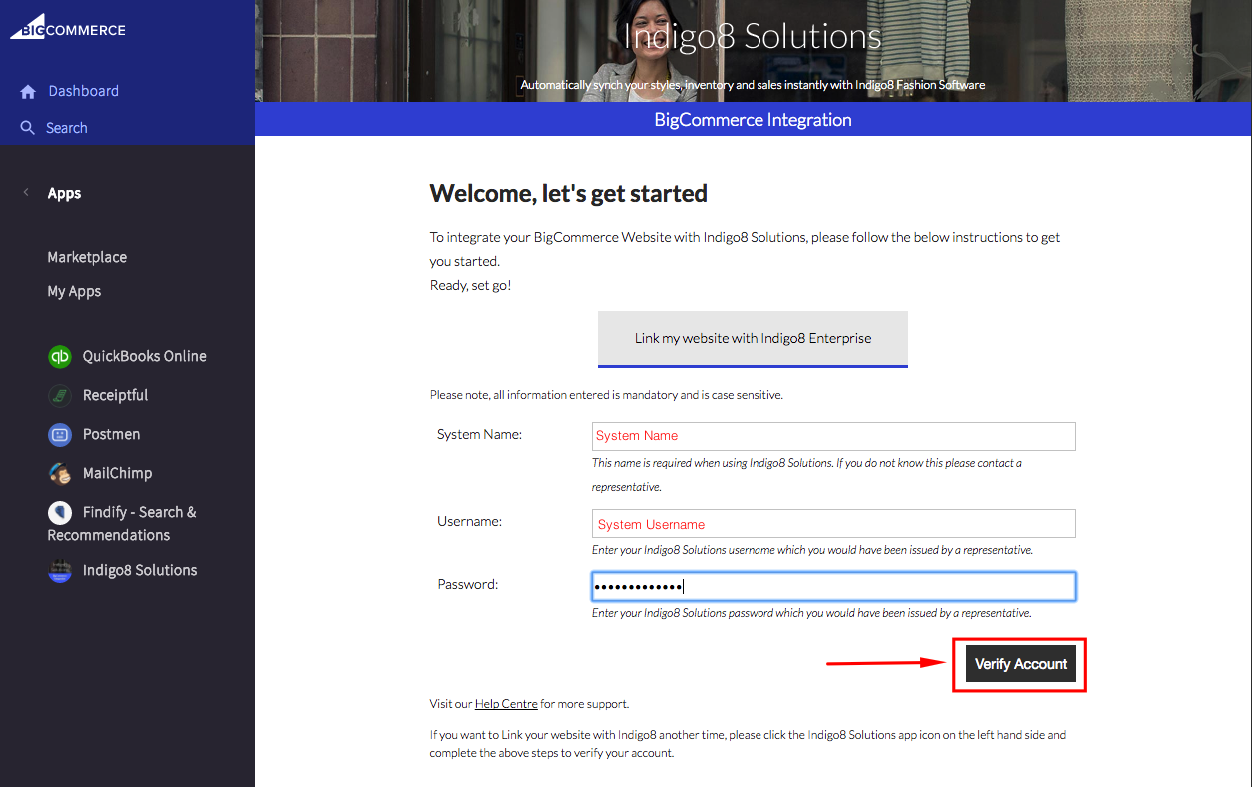
- Go back into BigCommerce. We need to enter a few fields to complete the integration process.
You will need to enter your SYSTEM NAME, USERNAME and PASSWORD. You will need to contact Indigo8 Solutions for more information regarding this.
Once done click VERIFY ACCOUNT.
7. Once the linking process is completed you will be given the below message. The integration process is now complete.
A few extra notes:
- Make sure you select SINGLE PRODUCT ONLY or PRODUCT PER COLOUR - this will export your style information based on this preference.
If you select SINGLE PRODUCT ONLY, it will display the style which contains multiple colours as one style instead per colour.
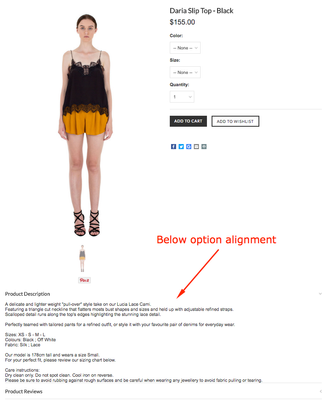
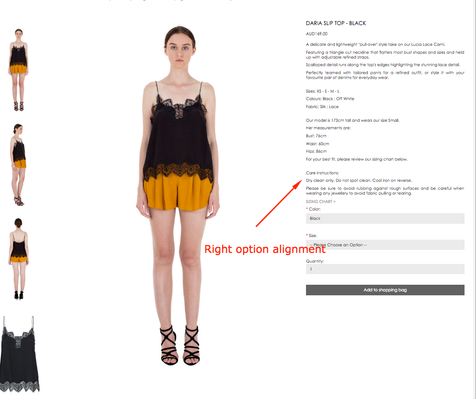
If you select PRODUCT PER COLOUR, it will display all colours as individual styles on your shop page. - Make sure also that you select RIGHT OPTION ALIGNMENT or BELOW OPTION ALIGNMENT - when exporting your products it will look at where to place the product descriptions. This will be contained either below or right hand side of the product page. See below images as reference.
- Make sure that OPTION TYPE is selected. This controls the SIZE and COLOUR component for your product page.
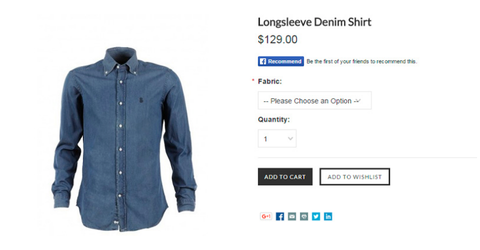
If you select DROP DOWN, it will look as per below. You will notice that both attribute types are drop down options.
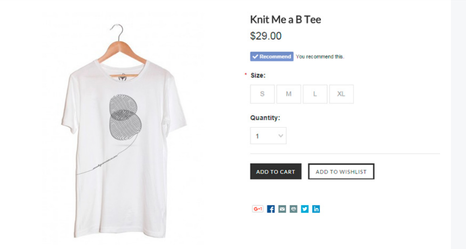
If you select RECTANGLE LIST, it will look as per below. You will notice that the size option is a rectangle list. It is recommended that the sizes are in rectangle list order as it presents the size options in a more clear way.
, multiple selections available,
