Customising Return Settings
When generating a return for the first time, you will need to set up defaults for the return functionality of the system. Including reasons for return, where the returns will be sent to and terms and conditions.
Step-by-step guide
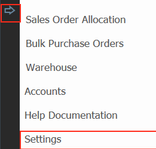
1. Click on the arrow, go to Settings
2. Click on the Sales Order tab, then the Returns tab
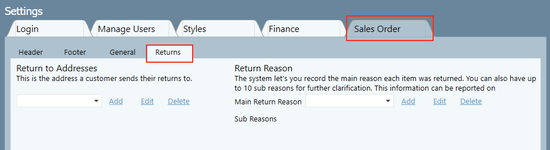
There are two parts to the screen: Return to Addresses and Return Reason.
Return to Addresses
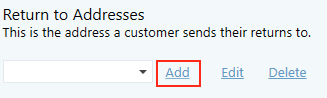
1. Click on the drop down list and view the existing return addresses. If you're not satisfied with the existing options, or there are no addresses listed, you will need to add one. Click the Add button to the right of the box.
Important
You can have more than one return addresses held in the drop down list. So when a customer has notified you that they are returning an item or items, you can select which place the item will be returned to.
2. In the first box, write the name of the Return Address. It may be the name of a store, or another warehouse. Then complete the address itself, followed by any terms and conditions that apply to returns for that address.
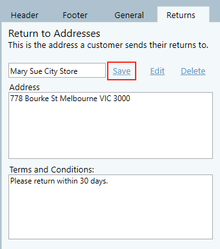
3. Click Save
Important
Return Reason
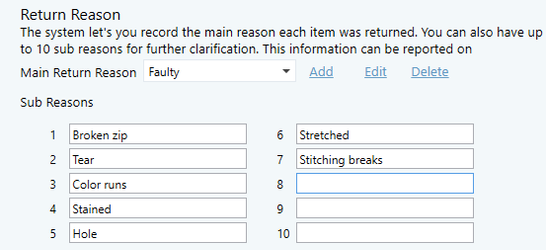
A return reason is the basic cause of a customer returning an item. There are some common general reasons, for example, being faulty or change of mind. But there are usually more specific reasons within those two broad categories, for example, a faulty item may have a broken zip and the change of mind may be because it was larger than expected for the size assigned to it. This is why in this section you are able to create a main reason, and several sub reasons within it.
1 Click on the drop down list and view the existing return reasons. If you're not satisfied with the existing options, or there are no reasons listed, you will need to add one. Click the Add button to the right of the box.
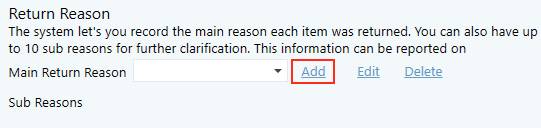
2. Write the main return reason in the white box next to Add, then fill in the sub reasons in the fields below.
3. Click Save button.
Important
If you want to delete a return reason, select it from the drop down list, and click the Delete button. If you wish to make a change, select the reason from the drop down and click edit.
Now that your system is set up, you can Create a Return.
Related articles