Step-by-Step Guide
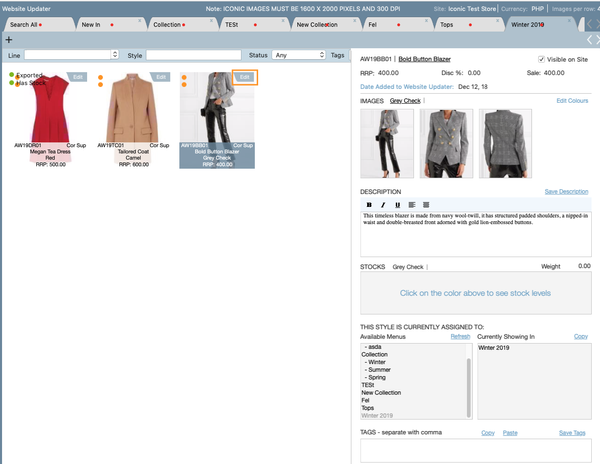
1. The first step is to fill out the product information:
- Select 'Edit' on the top right of each style
- The RRP will auto-populate from data entered in the bulk pricing screen. You can also apply a discount if needed.
- To add images, drag and drag from from your folder, or use the Capture function.
- Enter in the style Description
- Enter in the Fabrication details of the garment
- Enter in Care Instructions
- Stocks: When you select the product colour, the stock will appear. (This will only appear if you have linked your Customer: Online Website' to a warehouse - this is completed when you set up your Online Store as a customer)
- Available Menus: This will show you where you style will be located on your website. Add in additional categories when needed.
- You will not need to fill in 'Tags'
2. Next select the 'Iconic Field' button at the bottom of the screen. This will take you to a screen where you will need to fill in the information required by The Iconic.

