...
By STYLE # -You can filter your search so that you can see all the sales orders that contain that specific style number. Generally you would select this option if you were to create a purchase order for a single style.
By LINE - HIGHLY RECOMMENDED As mentioned above, this will return all the sales orders that are grouped within the selected line.

- By SO# - This will display all the styles contained within a single sales order. Typically this would be done if you were creating a back-to-back sales order and purchase order.
...
- By DELIVERY – As each sales order contains a delivery warehouse in order to signify which delivery address the order belongs to, you can filter your sales order search by warehouse. Typically this would be selected if you were creating a purchase order that would require all styles to be delivered to the same delivery address.
- By SUPPLIER – This will display all styles, which are manufactured by the selected supplier. A supplier can be saved against a style, which is used to represent the maker of the style. This search option is best used if all styles in your given collection have a supplier saved against them. This way you could filter you search by supplier and generate your purchase order directly to them. If you have multiple suppliers per collection, you could generate a separate purchase order by supplier.
By T.ENTITY – If you sell in multiple trading entities you could filter your sales order search by trading entity. This option allows you to select sales orders that use the selected trading entity.
For example if you have 2 trading entities in your system which are called “USA” and “AU”, when creating your sales orders you would have selected which trading entity would be used per order. For your American customers you would have selected “USA” and for your Australian customers you would have selected “AU”. Since you have sales orders, which contain 2 different currencies, on the sales order search, you could filter your sales orders by the 2 different trading entities. This option is recommended if you wish to create separate purchase orders per trading entity using a similar example as per above.By SO TYPE – In Indigo8 Lite, each type of sales order has a specific type assigned to it. This option is typically used if you wish to create sales orders per sales order type.
All wholesale sales orders have a “STD” type assigned to them.If you have an integrated website with Indigo8 these types of sales orders are assigned as “WEB”
If you havean integrated Point of Sale with Indigo8 you could filter your search by “POS”.
Info Please note, in most instances you would generate a purchase order as for wholesale “STD”.
Below describes further search options:
By GROUP BY STYLE (checkbox) – If this is selected it will display all sales orders by style. For example, if you are searching by a specific line and “GROUP BY STYLE” is checked, it will organise all the given sales orders by styles.
This is quiet quite helpful if you need to select certain styles and assign them to a specific purchase order if some of the styles within your collection are made by different makers.
- By DELIVERY – As each sales order contains a delivery warehouse in order to signify which delivery address the order belongs to, you can filter your sales order search by warehouse. Typically this would be selected if you were creating a purchase order that would require all styles to be delivered to the same delivery address.

- By GROUP BY SUPPLIER (checkbox) – If this is selected it will display all sales orders by supplier. For example, if each style within your collection has an assigned supplier, if this checkbox is selected, it will organise the styles according to which supplier is assigned to them.
- By AUTO-CONSOLIDATE ITEMS – SUPER IMPORTANT
It is highly recommended that this is checked. When AUTO-CONSOLIDATE is checked, when creating your purchase order, it will automatically combine every style by colour from each sales order into one line. This makes is it very easy for your maker to understand how many quantities to manufacture.
For example, if you have one style which contains 3 colourway’s (Black, White and Red), which is spread across 50 wholesales orders, when AUTO CONSOLIDATE is selected it will automatically consolidate that style from all the sales orders in 3 totals per colour. - By SHOW PRE ORDERS – When this is checked it will group all sales orders which are marked as ‘pre order’ which will be automatically generated from your integrated website.
In the below example, we have searched by LINE.- By GROUP BY SUPPLIER (checkbox) – If this is selected it will display all sales orders by supplier. For example, if each style within your collection has an assigned supplier, if this checkbox is selected, it will organise the styles according to which supplier is assigned to them.
...
| Info | ||
|---|---|---|
| ||
Please note, if you have selected “GROUP BY STYLE” or “GROUP BY SUPPLIER” you can ‘check’ specific styles, which you would like to assign to specific purchase orders. |
For example, on the below screen shot I have selected “GROUP BY STYLE” and selected the first style within my collection as I want to generate a purchase order for this style only. Please note, you can select one style or as many styles as you like.

5. Click Create PO once you have selected the sales orders which are ready to be manufactured.
| Info | ||
|---|---|---|
| ||
It is highly recommended that “AUTO CONSOLIDATE ITEMS” is checked. This means it will automatically combine and consolidate all your systems into a single line by colour on your purchase order. Please read point 2 under ‘AUTO CONSOLIDATE ITEMS’ for more information. |

6. Once you have clicked Create PO you will be taken to another screen where you will need to generate the purchase order.
This stage will allow you to assign which supplier the purchase order will be created for and also enter a lot more detail that is necessary for the purchase order to be generated.
Before you generate the purchase order you need to make sure the following is selected:
- Supplier – This is the supplier that is assigned to the selected purchase order. This is maker in which you are issuing the purchase order to. When you generate your purchase order report this is the name and address which will appear.
- To Customer – This is the customer in which the purchase order is being generated for. This is not a mandatory field. Typically this customer selection would be your company information as you will be the producer of the goods.
Deliver To – This is the warehouse in which the goods will be delivered to. For example, if you have multiple warehouses in your system, you can select which warehouse your specific purchase order will belong to.
Info Please note, when arriving your purchase order in the Warehouse Module, if you need to change the warehouse, there is an option to change this if required.
- Currency – This is the currency in which you will be buying the goods from your supplier.
- Ship Mode –Typically this represents how the goods on the purchase order will be delivered. This is the agreed shipment method between your company and the supplier assigned on the purchase order.
Ship Date – This is the date which you expect the styles on the purchase will be shipped to.
Info Please note, the ship dates that appear on this screen are being pulled automatically from the sales order. The date that it is pulling is the “FROM” date on the sales order.
If you have not entered any ship dates on your sales order, when you generate your purchase order the ‘ship date’ field will be blank for you to manually enter.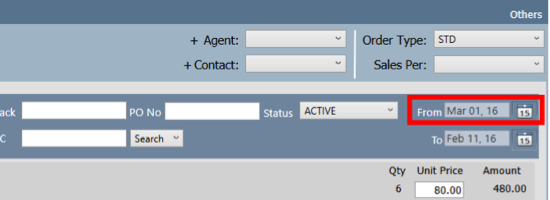
...
| Info |
|---|
Please note, The options that appear on this drop down can be controlled in the settings under the “finance” tab. |
- Buy Price & Currency – This is the landed price or the buy price of how much it costs to make the goods. This price would have been entered on the style itself under the buy price column or alternatively if you are costing your styles, you can do this under the style using the ‘costing’ tab.
This is the price that will appear when generating a stock on hand report from the warehouse module.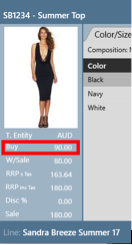
...
7. Once you have entered all the necessary information for your purchase order you will need to click Consolidate button.
...
| Info |
|---|
Please note, The purchase order number is a generated sequential number located on the top left of the purchase order screen. |
10. The last stage of creating the purchase order is to generate a report to give to your supplier. This is also known as generating your Purchase order.
...
| Filter by label (Content by label) | ||||||||||||||||||
|---|---|---|---|---|---|---|---|---|---|---|---|---|---|---|---|---|---|---|
|