This section will outline how to integrate your existing Shopify or brand new website with Indigo8 LiteSolutions.
Step-by-step guide
- Login to your existing Shopify account and go to this link httpshttp://appswww.shopifyindigo8-solutions.com/shopify/glasslite-integration
Click the GET button on the far right corner - You will automatically be taken to your Shopify website backend. Click the INSTALL APP button to start the integration process.
...
- install
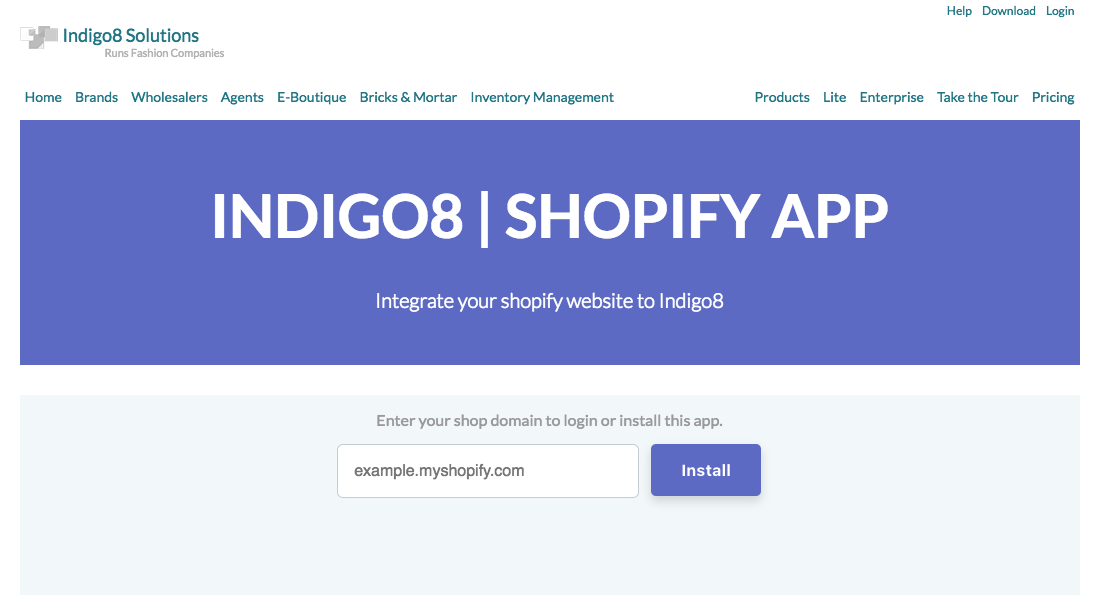
On this page, you have to enter your Shopify store on the box and click the "install" button as per below:
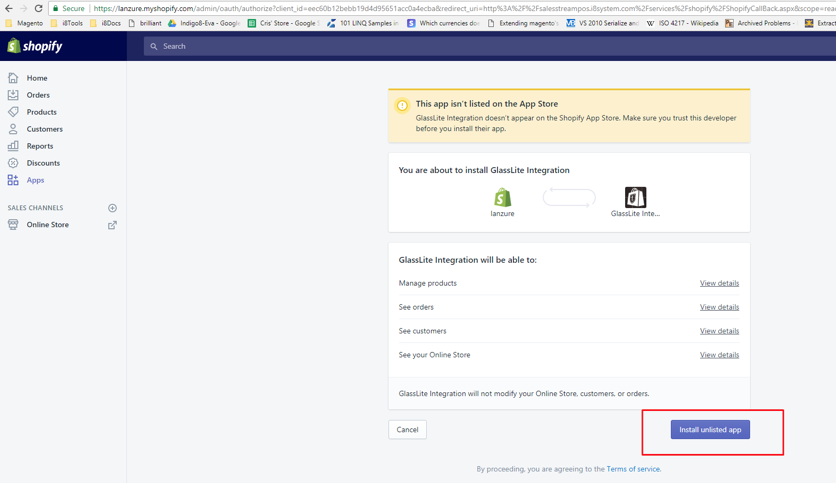
After clicking the install button, it will redirect you to your shopify store. It will ask you to login just in case you haven't login to your shopify store yet.
Once you are login please click the button "Install unlisted app" as per my screenshot below:
Once the installation is completed, you will be taken to a new page with the ACCESS TOCKEN.
This token is what links your Shopify account with Indigo8 Lite.Please save the token number. You have the option to email this for future reference. You will need to enter this number into the Customer Screen in Indigo8 Lite.
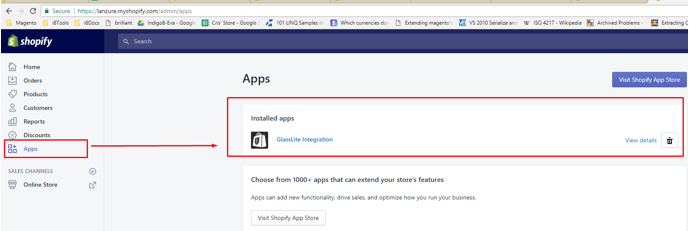
Now you can see that our app was installed to your store.
5. Login to the system and locate your existing Website customer or create a new Website customer.
This website customer is typically named as your online shop. For example, a business named "Grass Bred" will be called "Grass Bred Website" .
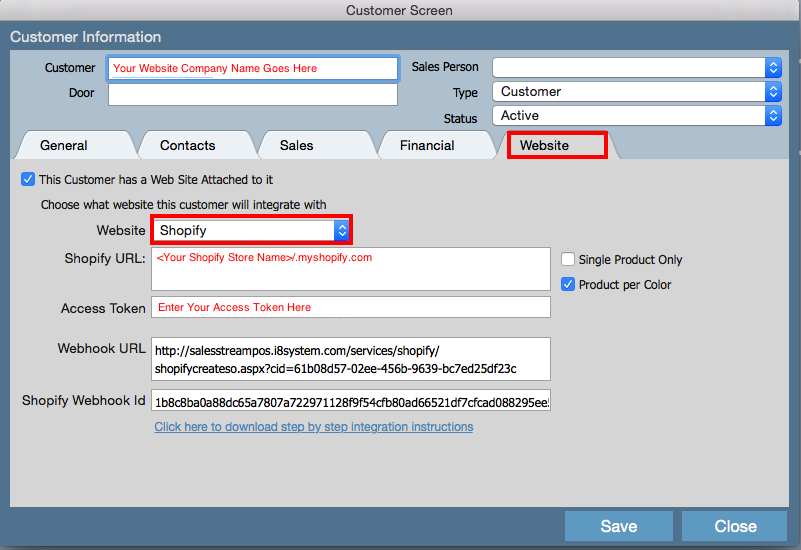
On the customer record, you need to make sure the following is completed in order to link your existing Shopify website with Indigo8 Lite.
Open up the Customer record and click the WEBSITE tab.
- Make sure you have checked THIS CUSTOMER HAS A WEB SITE ATTACHED TO IT. This will assign the given customer record to a specific website.
- Select SHOPIFY under the WEBSITE field
- Enter the SHOPIFY URL which is your Shopify Store Url - please do not enter your live website URL.
- Enter the ACCESS TOKEN which you would have received from step 4.
- The WEBHOOK URL and SHOPIFY WEBHOOK ID will be discussed in another section, please click here.
Once done click SAVE on the customer record.
66. Once done click SAVE on the customer record once all steps are completed. You will notice at the point of creating the customer record it would have populated the WEBHOOK URL. This is what will automatically make the sales orders appear from Shopify into Indigo8 Lite.
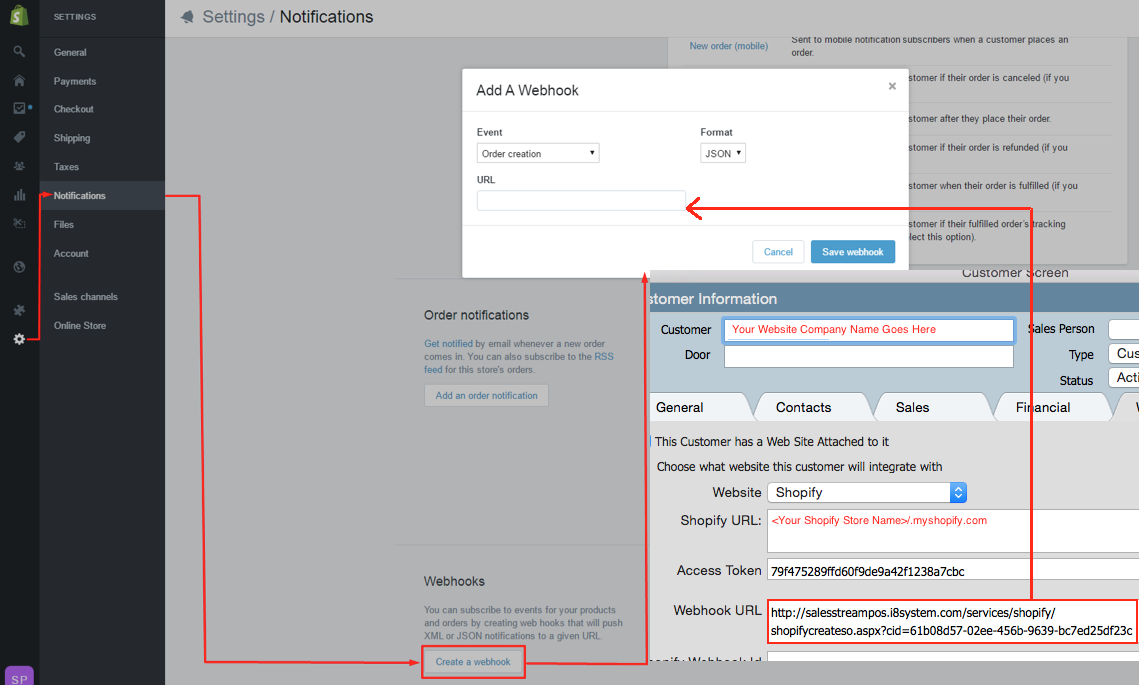
7. Log into Shopify and go to SETTINGS >> Locate a section called WEBHOOKS >> Click CREATE A WEBOOK. A pop up will appear which you will you need to enter a few details.
- EVENT select ORDER CREATION
- FORMAT select JSON
- URL should be taken from the customer record. Please copy he Webhook URL from the customer record and paste this directly into the URL field.
- Click SAVE WEBHOOK once done. You will see that it would have it in the background.
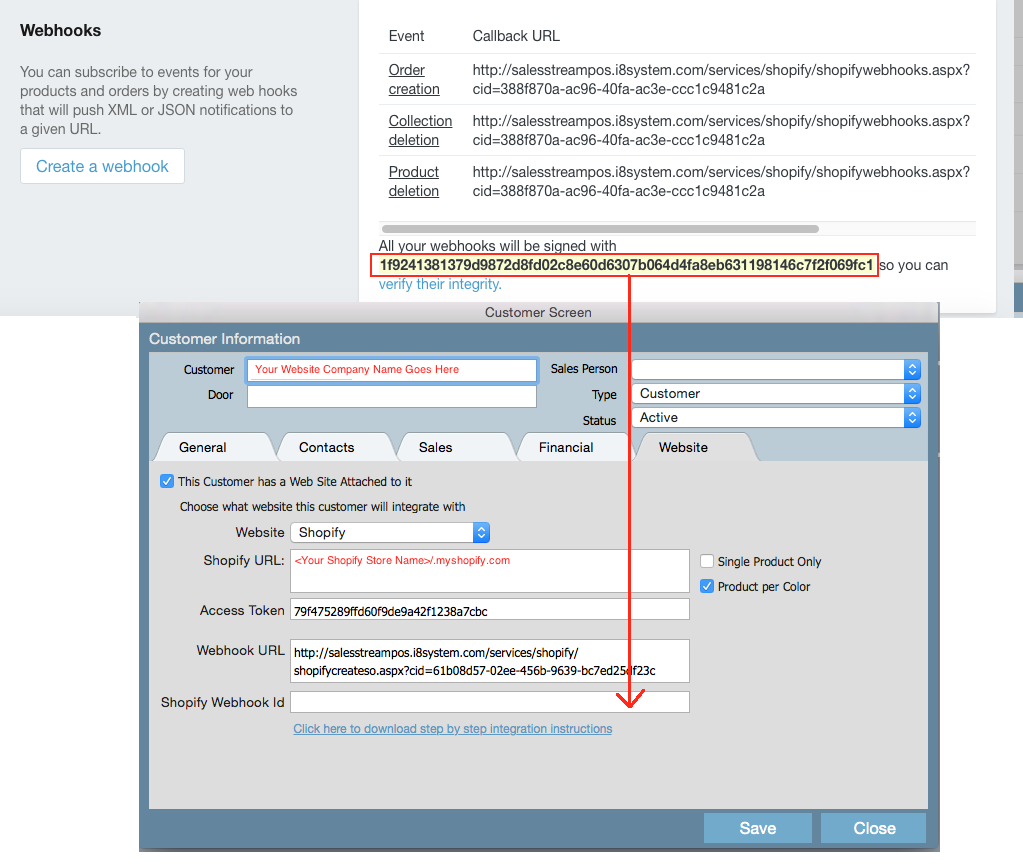
8. Once the above Webhook is created you will need to copy the string located under 'All Your Webhooks will be signed with' customer Record and copy the Shopify Webhook ID.
This the generated ID Shopify creates to validate the integration between Shopify and Indigo8 Lite.
Click SAVE once the data has been entered.
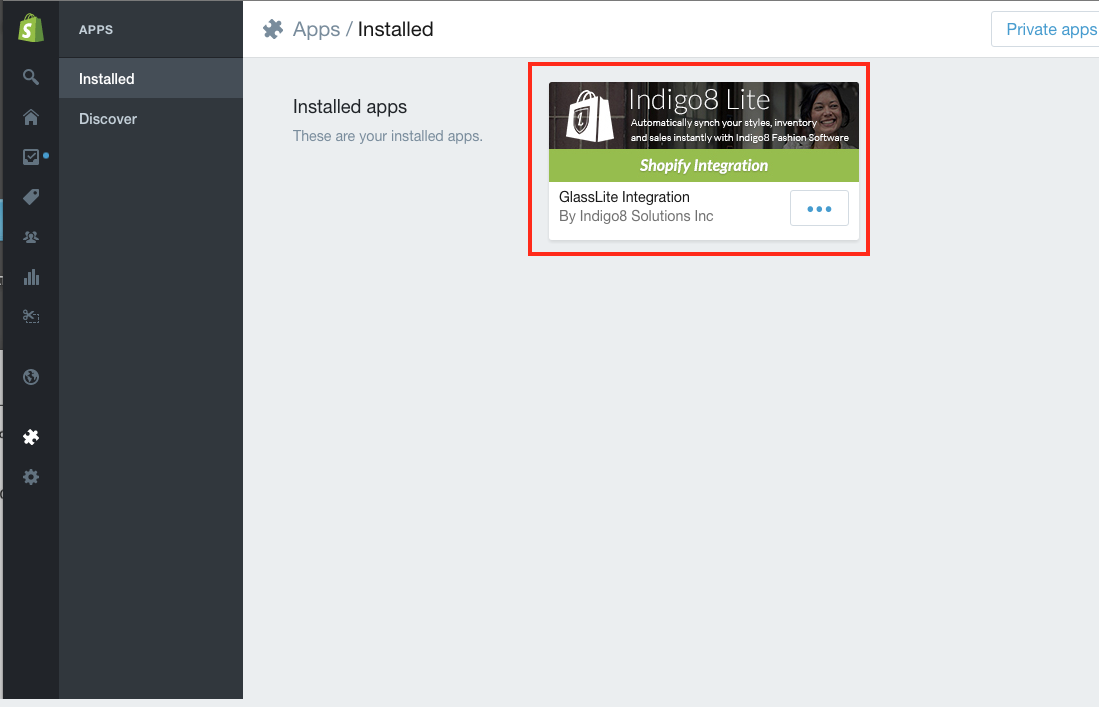
9. After the customer information has been entered you can login into the apps section in Shopify to see the newly added app.
You can now commence exporting your styles into your Shopify website!
Related articles
| Filter by label (Content by label) | ||||||||||||||||||
|---|---|---|---|---|---|---|---|---|---|---|---|---|---|---|---|---|---|---|
|
| Page Properties | |||
|---|---|---|---|
| |||
|


