Step-by-step guide
1. Click a menu arrow and choose Contacts
...
2. Select CLIENTS select ADD CLIENT the Customer tab and click on ADD CUSTOMER to add your new customer
...
3. Please find below the definitions of some of the less obvious fields.
Customer -
thisThis is the Customer Name **MANDATORY FIELD
Parent Company -
thisThis is how you would like to group your customers
. Contact(contact someone at Indigo8 to set this up for you
.)
Sales Person - If this customer has a designated sales person assigned to it then select them from the drop down.
Then every time a sale is created thisDoing this allows the sales person
willto be automatically
beassigned to the sale every time a Sales Order is created.
Type - The system allows you to
haveset up 3 different types of customers
being;.
Customer
(a- A regular customer that you sell to
).
Agent
(Agency- The agency that sells for you
) and,.
POS -
ifIf you have a retail store integrated with Indigo8.
Department -
this representsThis represents the door if you are entering a customer that sells with multiple doors. Not a mandatory field.
Status -
byBy default, this should be ACTIVE.
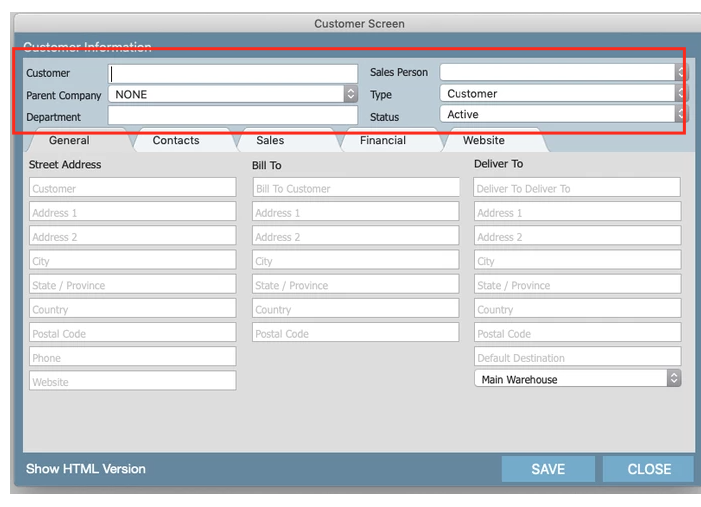

General Tab
Street address -
isIs the physical location of the customer.
Bill To -
isIs the address where invoices can be sent.
Deliver To - Is the address where products will be shipped for this customer.
Warehouse - You can also set the default warehouse on the bottom of this screen.
Auto Freight for this customer -
onlyOnly turn this ON if you have automatic freight turned on in your system.
Sell Type -
thisThis is the agreement between your company and the customer on how you sell to them.
...
Sales Tab
Lets you search on sales for this customer only by date or Sales Order number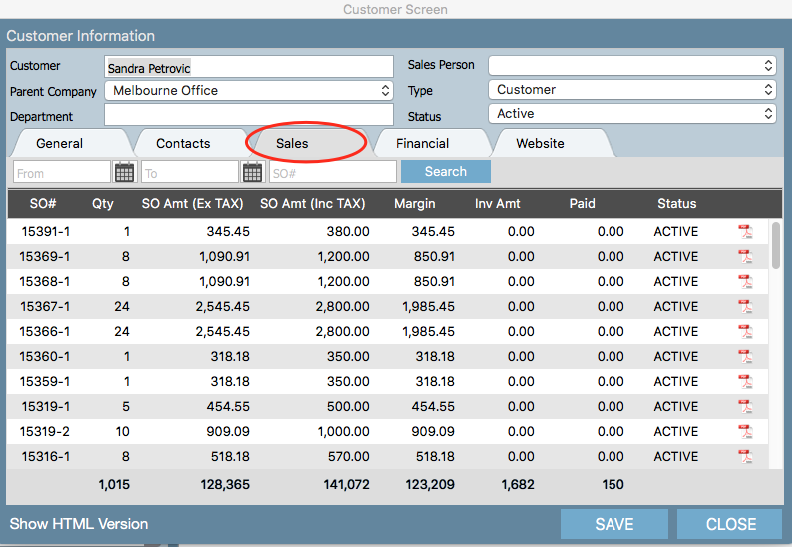
...
Financial Tab
There are a number of important fields in this section.
First Column
Trading Entity - This will determine the invoice header that will be applied to the customer's invoices along with the price (or currency) displayed on
ordersorders. **MANDATORY FIELD
Currency - This will determine the currency that displays on
ordersorders. **MANDATORY FIELD
Account Export Identifier -
thisThis is the card# for customers using MYOB.
Special Sales Account -
thisThis is if you have set up an overriding account number in XERO.
Sales Order and Invoice Terms - Individualised customer terms can be applied here.
System Term/Days -
numericNumeric field that you would enter to identify the customers specific terms.
Terms From -
eitherEither INV DATE or END OF MONTH.
Deposit Required - Turn this box on if you require a deposit from this customer.
Deposit % - Enter the specific deposit % that you need to pick up against the
customercustomer.
Second Column
Agent -
selectSelect the agent that is representing this customer on right of that is the Agent Commission %
Customer No -
ifIf you want to store a number for a number of reasons. Usually needed for Joor or importing sales orders with excel.
XERO Tracking -
canCan track different categories per customer which will appear in XERO.
Suspend Automatically when invoices are late by -
setSet a number of days or credit limit passes is reached and it will automatically suspend the customer.
Suspend Account -
whenWhen ticked will prohibit sales orders and invoices from being created.
Stock Allocation Rank -
whenWhen arriving stock in, it will be allocated based on this setting. 1 = priority
#1number 1 and 10 = priority number 10 (
usually represents1 representing a
badtop customer).
Third Column Column
Discount -
ifIf a customer receives an automatic discount.
Tax - If the country or state that your customer is trading in requires that you add Tax to the orders then you will need to apply the % tax here.
InIn the UK and NZ this is known as VAT in Australia it is GST.
Division -
usuallyUsually to identify a brand that customer purchases.
Office -
fieldField used if using Agent Enterprise Version.
EDI integration -
onlyOnly used if you sell via EDI ie David Jones or Myer.
Bpay -
canCan save this number against a customer.
VAT # -
canCan save this number against a customer.
SO PACK -
usuallyUsually used for 3PL
intergrationsintegrations.
Customer Approved - Customers need to be approved (by your accounts team) before any orders can be placed.
Comments- any general comments needed against a customer.
...
Related articles
| Filter by label (Content by label) | ||||||||||||||||||
|---|---|---|---|---|---|---|---|---|---|---|---|---|---|---|---|---|---|---|
|
| Page Properties | ||
|---|---|---|
| ||
|