Steps to walk you through how to create an excel sales order form which you can send out to your agents and customers to then import directly into Indigo8.
Step-by-step guide
How to create the Excel Form
...
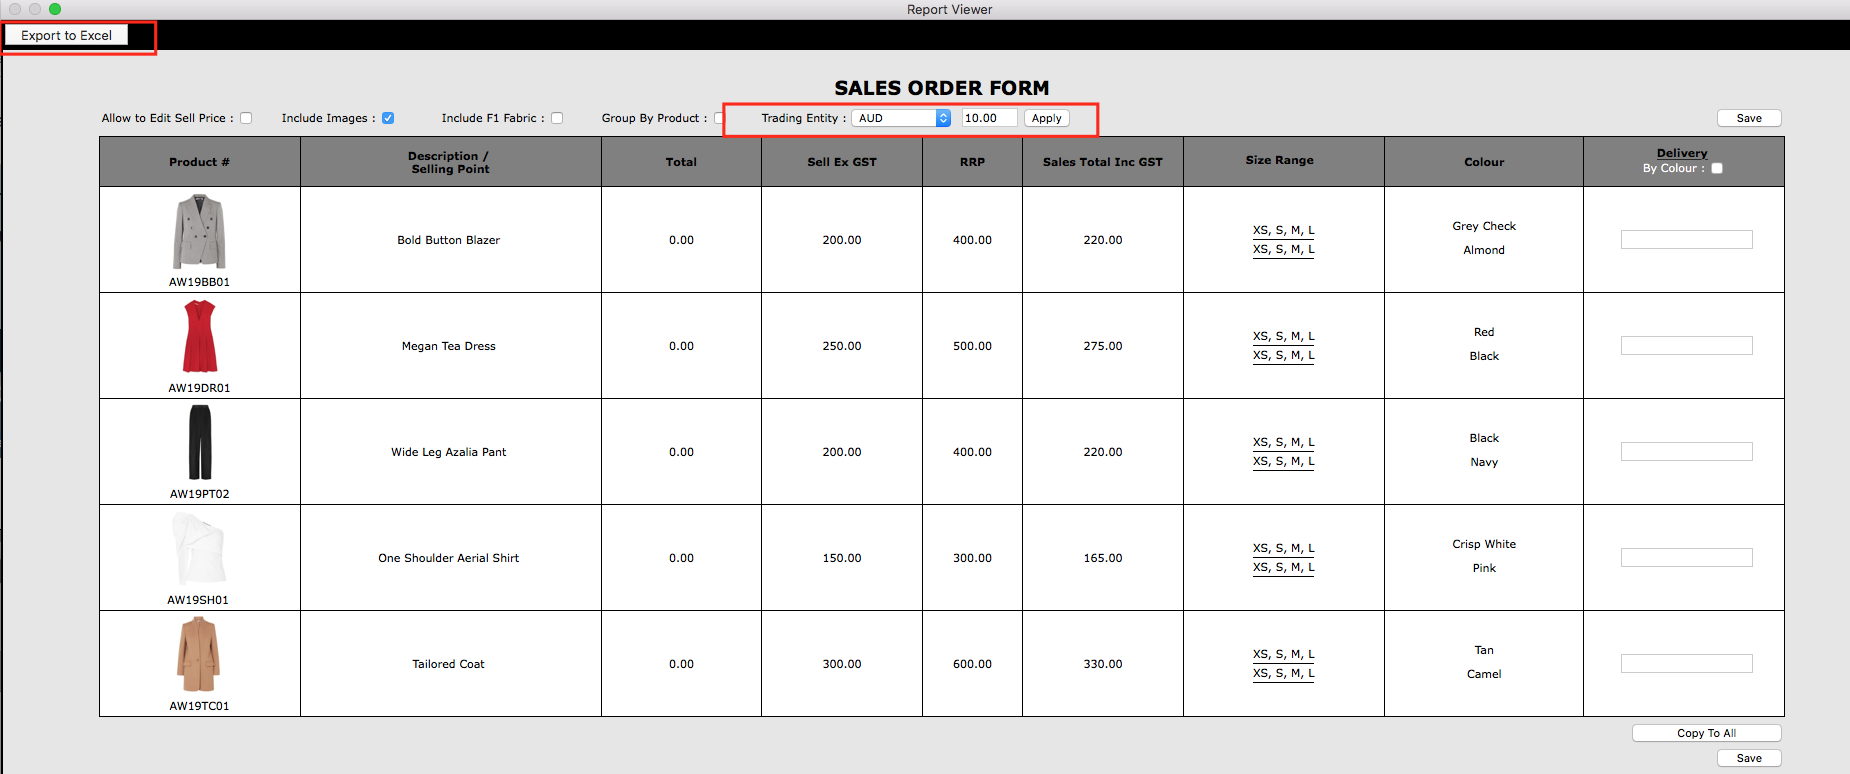
Select Report > Sales > Sales Order Form
3.
How to Import the Excel Form
3. Select your trading entity that you want the prices to appear in. The tax will appear next to the trading entity appropriately. This will add the tax amount against the SELL EX GST price (your wholesale price).
Click APPLY for the prices to update.
Click EXPORT TO EXCEL
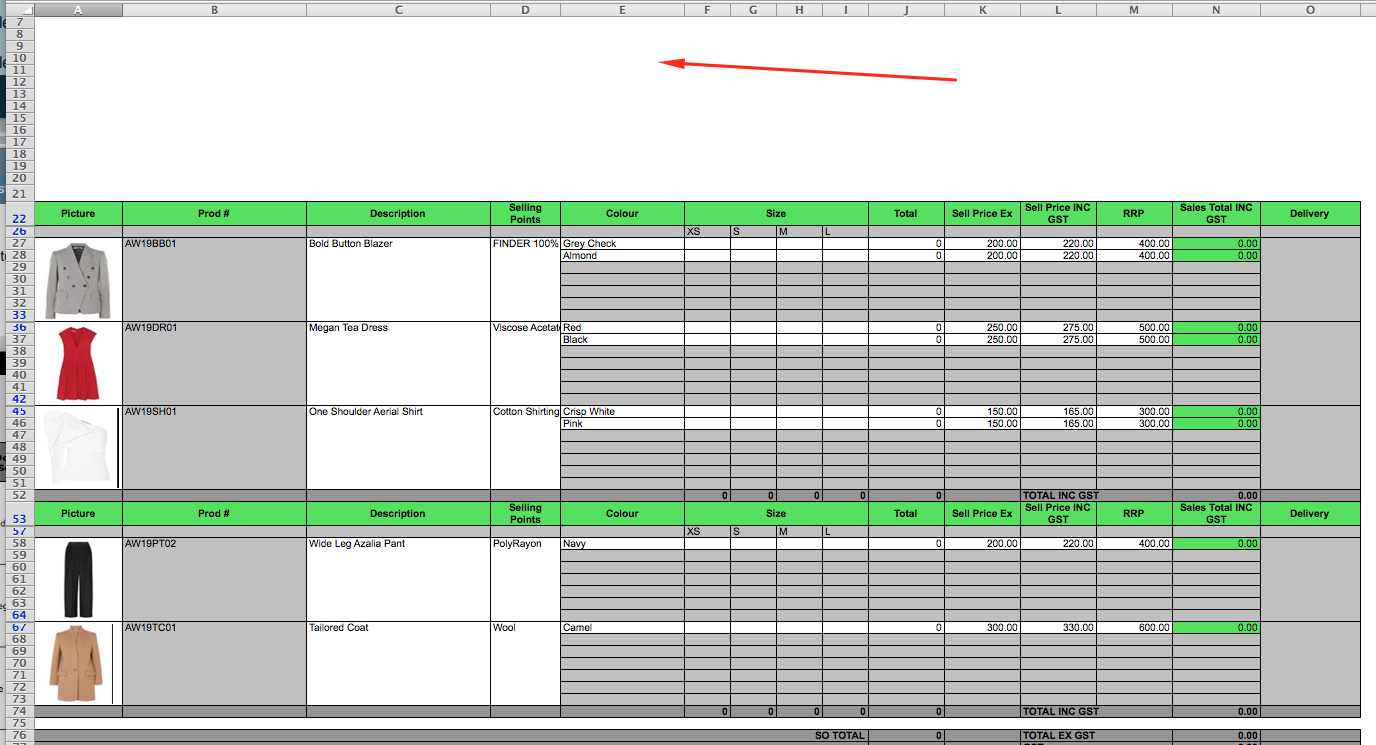
4. Below is how the excel file will look like.
Points to Note:
- We automatically group the excel report based on size range. So if you have many size ranges in your collection it will group the together appropriately.
- We also leave the blank space at the top so you can drag in your company logo and other details you would like your customer to enter
5. There are a few options on this report to show certain fields:
Allow to Edit Sell Price: If this is checked, this allows your customer to enter whatever price is on the excel and then import that directly into the system.
Include Images: This shows or hides the images onto the excel. Normally this is checked.
Include F1 Fabric: This allows your to insert the fabric of the garment into the "selling points" report.
Group By Product: This will organise the report based on the product category that is assigned in product search. It will be Grouped by Alphabetical Order.
Delivery: If your styles are dropped in different periods you can indicate that on the excel report. This means when importing the excel form, if there are multiple delivery periods, we will insert each delivery into a new SHIPMENT.
We recommend that you insert the word DROP 1.. DROP 2.. DROP 3 under the delivery column.
We do have the option to even go deeper and create different delivery dates per colour. You can use the "by colour" checkbox to do this.
Select SAVE once done
The text entered will appear on the far right hand side.


