...
To find the Data Entry Mode, open the product search, tick ‘Data Entry Mode’ at the bottom of the page. The opposite side of your screen will populate with the data entry screen. You will then be prompted to select a style.
How to add Fabrics & Trims against your style
- Select your style in Product Search and ensure you have selected Data Entry Mode at the same time.
- Select your template name at the top. Locate your fabric and drag your fabric onto the Fabrics table.
3. Below is how it will look once the fabric is dragged across.
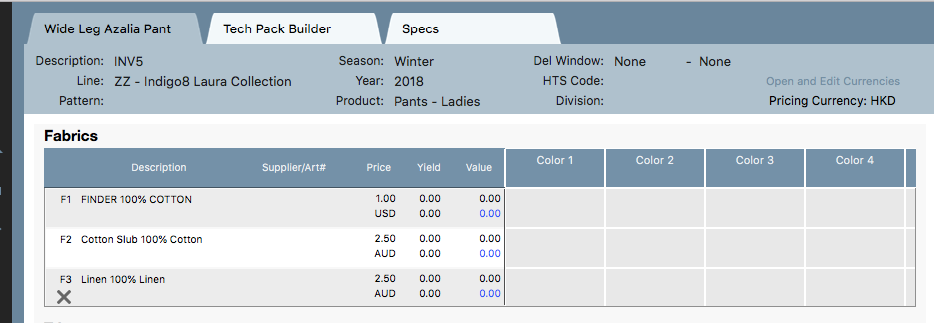
You can add many fabrics against a style. Below is an example of how it looks when there are 3 fabrics against a style.
You can click the X at the bottom of F3 to remove the fabric if required.
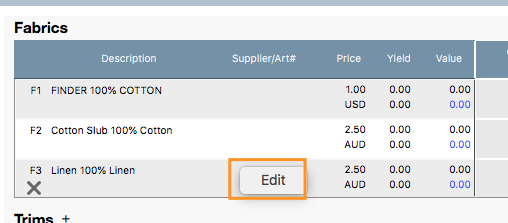
If you need to edit the fabric slightly all you need to do is right click the fabric and click Edit.
Then the below pop up will appear so you can edit your fabric. Hit Save once done.
How to add colours against your style
How to add a size range against your style
Below is an explanation of each section of Data Entry Mode.:
The Top of the page will populate information that was entered in when the style was created:
...
We also have the ability to amend the 'Sell' colour name. In the Fabric example below, i have amended the name of 'Pink' to 'Berry' in the cell above. The purpose of this is, is to change the 'Sell' colour on the product so when sold, you can sell in 'Berry' and keep the original fabric colour as Pink. The Sell colour flows through to your sales order, purchase orders and your website.
Costings
The Costings section enables you to add a variety of costs in a specific currency. You also have the ability to rename the costing items.
There is a comment log to the right on the costings which will populate as any new costings or amendments are saved.
Sizes
The sizes are created in the Main system and then appear in this area of Indigo8. Click on Sizes to view the range of sizes that have been created.
...
You will not be able to delete a size range if Sales Orders and Purchase Orders have been created. If you need to do this, please contact your account manager and they will be able to help you action this, whilst ensuring your SO's and PO's are updated correctly.
Costings
The Costings section enables you to add a variety of costs in a specific currency. You also have the ability to rename the costing items.
There is a comment log to the right on the costings which will populate as any new costings or amendments are saved.
Images
Additional images can be dragged from your computer file, into Indigo8 in the Image field. See below example.
...


