Partially Invoicing
There may be situations where you only want to invoice part of the order. For example, one style on the order is taking longer then expected to make and you won't be able to send it to the customer for another month. You cannot invoice them for that style when they haven't received it, but you still want to invoice them for the items on the sales order that were made on time and you have sent to them. The system allows you to choose which items on the sales order you want to invoice for now, and allows you to leave some items to be invoiced later.
There are two methods of partially invoicing, one method is if you're generating one invoice at a time, and the other method is if you're generating a lot of invoices at once. The two methods are outlined below.
Step-by-step guide
One Invoice at a Time
1 Click on the arrow and click on Sales

2. Search for the sales order for which you want to invoice. Refer to How to Search Sales Orders article for more information.
3. Click the + button to open the sales order.

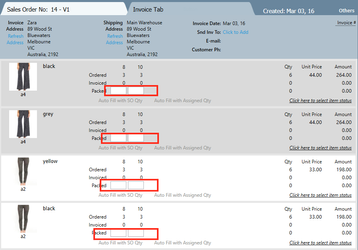
4. Once the sales order is open, the Invoice tab will become available. Click on it.
5. The next step is to enter quantities in the boxes for the items you DO want to invoice. If you do not wish to invoice an item, leave the white boxes next to Packed as empty
For the items you wish to invoice, you either click Auto Fill with SO Qty or Auto Fill with Assigned Qty. When AUTO FILLING there are a two main options:
- Auto Fill SO Qty – This will just load the number of pieces left to ship into the packed qty. If the customer ordered 8 pcs in size 8, then it will load 8 pieces in size 8. If 3 of those had been invoiced already, it would load 5.
- Auto Fill with Assigned Qty - will only work if you have an integrated warehouse. And you use the warehouse to arrive a shipment. As part of the process you can ASSIGN the received goods to the Sales Order’s This then becomes the ASSIGNED QTY.
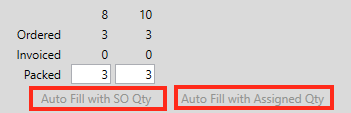
Or you can manually enter the number in the box yourself.
6. Click Generate Invoice at the bottom of the screen

7. The following pop up box will appear. It gives you two options: the first option being that you will invoice the items at a later date and put them on 'back order', the second option is to never invoice the items. Tick a box.
(for the purposes of this example I'll be ticking 'Put the Remaining Items on Back Order' box)

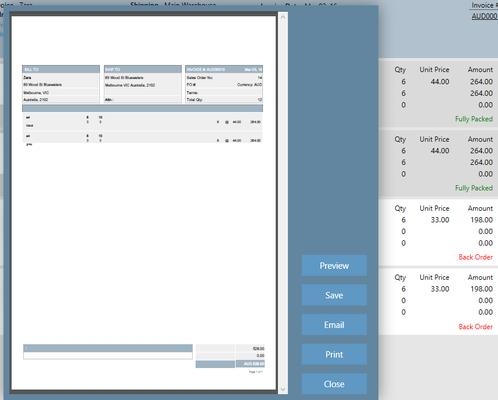
8. Click Generate Invoice. The invoice will be generated with part of the order on it. On the invoice screen, the items that were invoiced will have 'Fully Packed' written next to them and the items to be invoiced at a later date will have 'Back Order' next to them.
9. When you want to generate an invoice for the Back Order items, repeat steps 1-8.
Invoicing more than one order at a time
1. Go to Warehouse screen

2. Click on the Dispatch Tab

3 Enter what you wish to search by in the search bar. You can choose to search by one field or by multiple fields to narrow the search further. In the example above, we're searching by Customer David Jones.
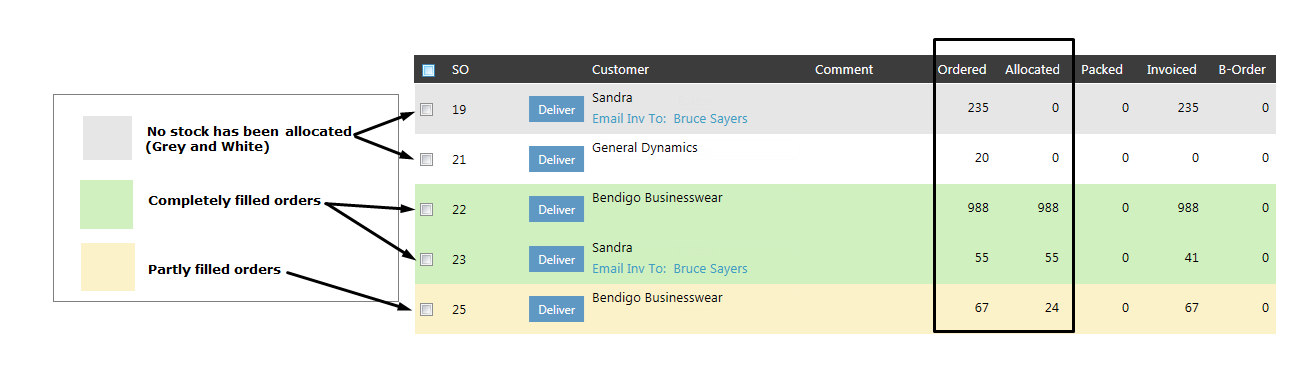
4. Next tick the relevant check boxes. You will be able to see from the diagram below that checking the box next to Yellow Orders will retrieve partly filled orders and checking the box next to Green Orders will retrieve fully filled orders. Lastly, not ticking either box will return both completely filled, partly filled and non-allocated orders. For partially invoicing orders, it's best to leave the green box unchecked.
4. Click Search
5. Check the boxes of the sales orders you wish to partially invoice.
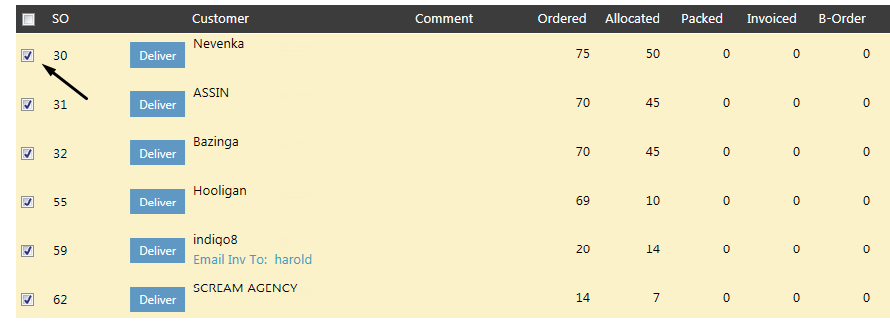
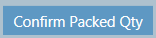
6. Click Confirmed Packed Qty button (located near the search bar)
7. The following pop up will appear. Ensure that you select Allocated Qty and Set un-shipped items to BACK ORDER.
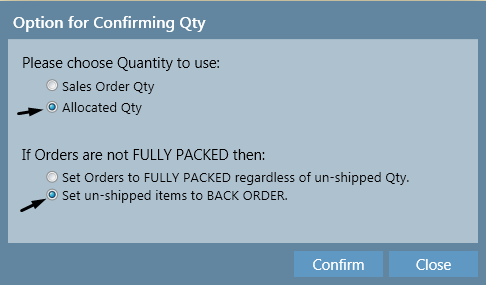
8. Click Confirm button.
You'll notice that the the figure that was previously in the allocated column, has moved to the packed column.
And the the B-Order column now has a value where it used to be zero; being the Ordered value minus the Packed value.

9. Next click Gen Invoice button (located near the search bar up the top of the screen)

10. A pop up window will open. Read the options and select how you would like to receive the invoices.
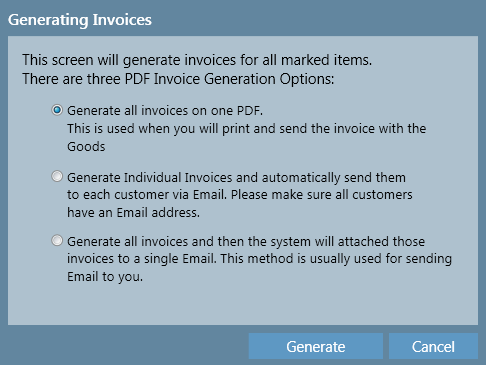
11. Click Generate button
Related articles