Dispatching Orders
When you're ready to dispatch either one or multiple orders, the dispatch screen will guide you through the process of packing the orders ready for shipment, invoicing and finally closing them.
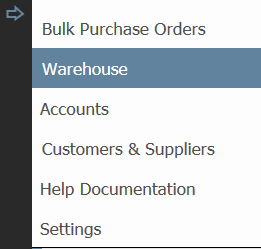
1. Click on the arrow and select Warehouse screen
2. Click on the Dispatch tab

3 Enter what you wish to search by in the search bar. You can choose to search by one field or by multiple fields to narrow the search further.
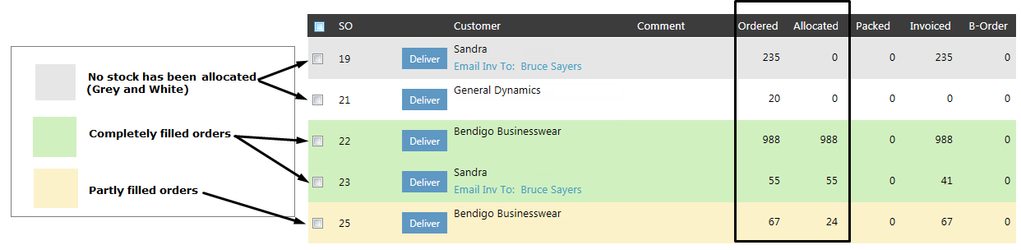
4. Next tick the relevant check boxes. You will be able to see from the diagram below that checking the box next to Yellow Orders will retrieve partly filled orders and checking the box next to Green Orders will retrieve fully filled orders. Lastly, not ticking either box will return both completely filled, partly filled and non-allocated orders. For partially invoicing orders, it's best to leave the green box unchecked.
4. Click Search
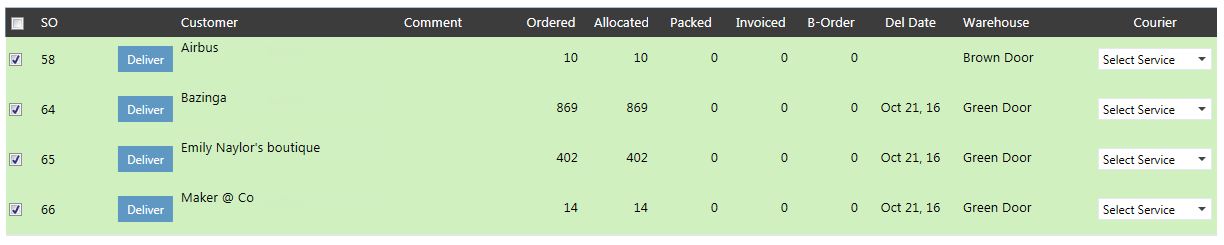
5. Check the boxes of the sales orders you wish to dispatch.
Next, you will be able to see the following buttons under the search bar. The process for dispatching involves clicking each button, starting from left and moving to the right. Note that buttons including Confirm Packed Qty, Gen Invoice and Remove from Screen are mandatory, and the others are not.

If you are interested in reading about a specific function, click on its name below to be linked to that part of the article:
Pick Ticket (not mandatory)
A pick ticket is a document that helps staff know what styles to pick off the shelves of the warehouse in preparation for packing the orders.
1. Click Pick Ticket button

2. The following pop up will appear. The Sales Order Qty refers to the quantities as listed on the sales order. The Allocated Qty refers to the quantity of items assigned to the order in the warehouse. You also need to decide whether you also want to print the packing list at the same time. Make your selection: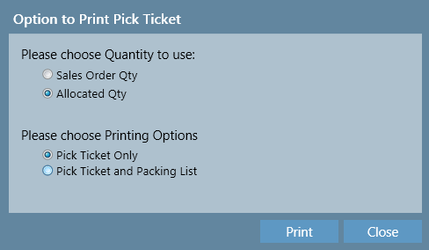
3. Click Print at the bottom of the window
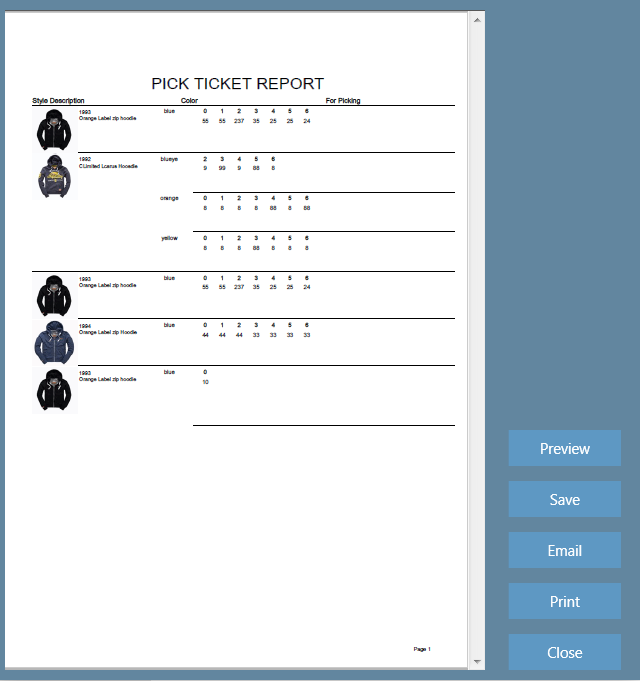
The report will be generated as follows:
Confirm Packed Qty (mandatory)
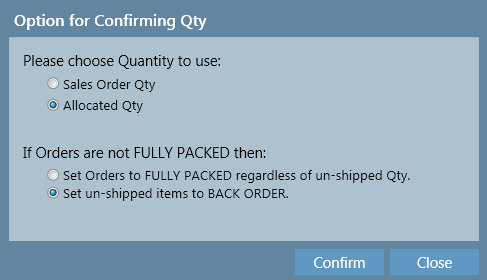
This step determines the quantity of items to be packed. The system prompts you to choose between either the Ordered quantity or the Allocated quantity of an order for packing.
1 Click Confirm Packed Qty button

2. The following pop up will appear.
The Sales Order Qty refers to the quantities as listed on the sales order. The Allocated Qty refers to the quantity of items that were entered at the time of arriving the purchase order into the warehouse. Next you need to decide what will happen if you have an order that isn't fully packed. The 'Set Orders to FULLY PACKED regardless of un-shipped Qty' will cause the order to appear as filled and the customer will never receive the items, or you can select 'set un-shipped items to BACK ORDER' to create a back order for the items and have the customer receive the items at a later date.
Make your selections:
3. Click Confirm button
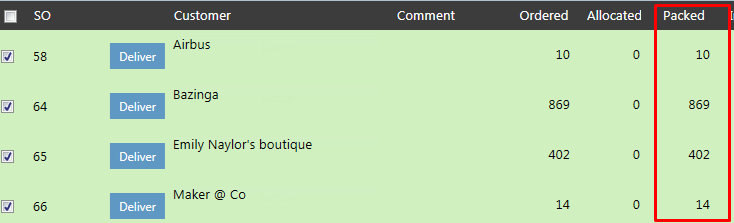
You will notice that the Packed column now has figures in it.
Packing List (not mandatory)
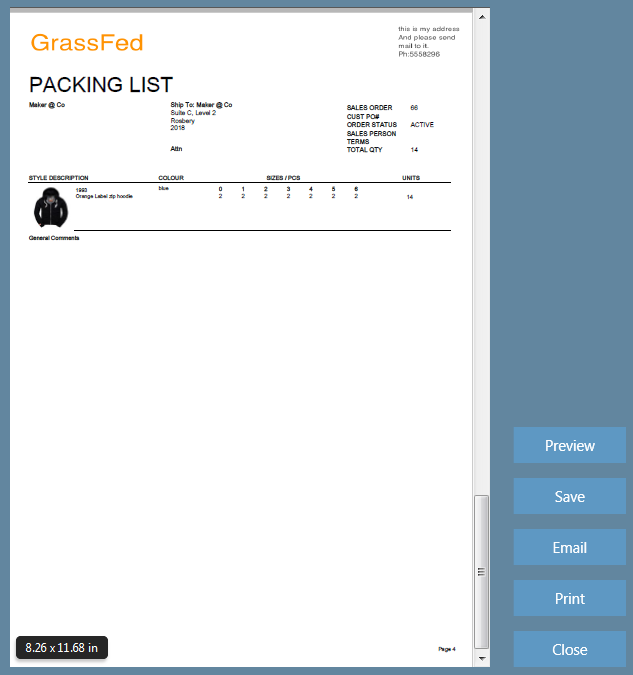
A packing list is a document that helps staff to know which items to select when they are packing orders ready for shipment.
1 Click Packing List button

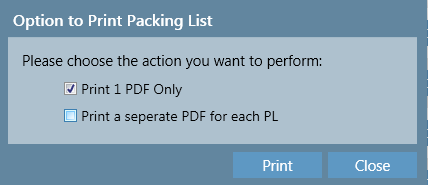
2. The following pop up will appear. Tick the first option if you want the packing lists for the orders in one pdf, or if you want a separate packing list pdf for each order select the second option.
3. Click Print button.
The packing list will be generated as follows:
Gen Invoice (mandatory)
This button allows you to generate multiple invoices at once.
1 Click Gen Invoice button

2. The following pop up window will appear. Select an option:

3. Click Generate button.
The invoices will be generated and will be shown in a preview window.
Retrieve Invoices (not mandatory)
This feature allows you to retrieve invoices that were created at an earlier time and have them emailed to you.
1 Click Retrieve Invoices button

2. The following pop up will appear. Click on the email address, and it will turn into a white text box where you can enter the email address for which you'd like the invoices to be sent. Hit the Enter/Return key on your keyboard.
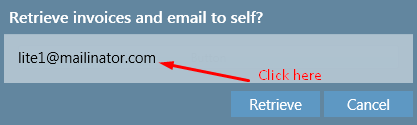
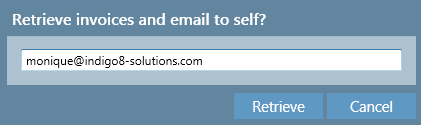
3. Click Retrieve button.
Check your email inbox and you will find an email with the invoices enclosed as an attachment.
Remove from Screen (mandatory)
This function changes the status of your order to closed. You will only click this button when you have already packed your goods and invoiced them.
1 Click the Remove from Screen button

2. The following pop up will appear. Click Yes if you are about to deliver the selected orders.
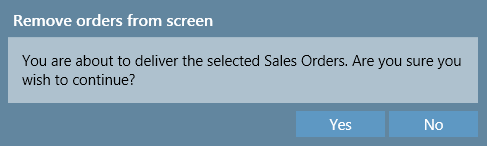
If you clicked Yes, you will notice that the orders have been removed from the screen. If you return to the sales order screen, and open the sales order, you will notice the status has changed to 'CLOSED.'

Related articles